ProDon:Configuration of a Standard Type Receipt
| Configuration of a Standard Type Receipt |
ATTENTION : This document is for VERSION 5 of Prodon. To go to version 4, click here.
Introduction
The standard receipt is available in many formats, but its customization is limited. This receipt is constantly updated by Logilys and is in compliance with the CRA (Canada Revenue Agency) and the Canadian standards. Therefore, if the software version is updated regularly, the receipt is updated at the same time.
General Configuration of the Receipt
NOTE: Before undertaking the configuration of the type of receipt, the general configuration must be performed.
To configure a Word type receipt, consult this procedure.
Configuration of standard type receipt
The receipt structure is built by the Logilys team. The only elements that may be modified are managed in these tabs.
" Paper " tab
The " Paper " tab allows the configuration of the standard receipt type.
|
For the next examples, please refer to the Example of paper receipt options. | |
 | |
|
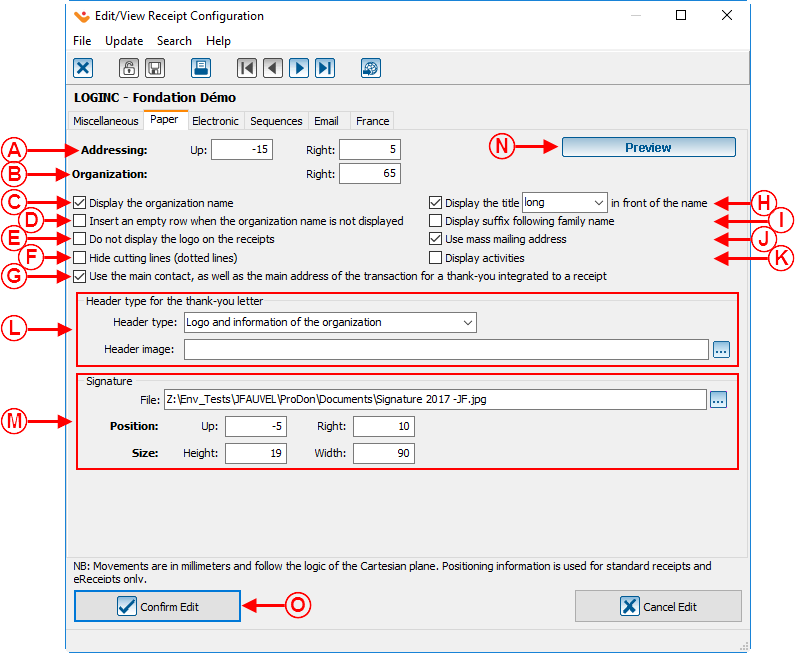
A: Allows the configuration of the address block position, that will contain the donor's personal information. Adjust the numbers in the " Up " and " Right " section in regards to the desired position of the address block. For example, to lower the address bloc, you need to decrease the number in the " Up: " box. |
B: Allows the configuration of the organization's information position depending on the logo's size and position which is in the upper left corner. Adjust the number in the " Right: " box. NOTE: The logo fills all the space available until you enter the organization's information to be displayed. Therefore, when adjusting the information's position, the logo adjusts itself automatically. |
|
C: Enables the organization's name that is issuing the receipt to be displayed on the receipt. |
D: If box C is not checked and this one is, there will be an empty line in place of the organization's name. |
|
E: Removes the logo of the organization from the receipt. |
F: When this box is not checked, the cutting lines separating each copy of the receipt is printed. |
|
G: Allows the use of the main contact and main address of the transaction for a receipt with an intergrated thank-you. |
H: Allows the user to choose if they want to use the " short " or " long » title that is displayed before the name on the receipts. |
|
I: If needed, this box enables the suffix that follows the client's last name on the receipt to be displayed. |
J: Allows the use of the Mass Mailing address format (747, Pierre-Roux Blvd East, suite 202) instead of using the Canada Post format (202 - 747, Pierre-Roux Blvd E). |
| K: Shows the activities for which the donor has made a donation for on the receipt. | L: Allows the user to select what will be displayed on the header for the letter with an intergrated thank-you to the receipts. |
| M: Allows the official signature to be displayed by selecting the path of the .jpg file, adjusting the size and position. | N: The " Preview " button shows an example of the receipt just for the purpose of seeing where the items will be positioned. To see the example that can be seen when the user clicks on the " Preview " button, click here. |
| O: Once the user is done with the configurations of the receipts, click on the " | |
" Electronics " tab
The " Electronics " tab allows you to configure the issued receipts via the IMakeAnOnlineDonation. This tab is only visible only if you have the " Online Donation " Module.
" Sequences " tab
The " Sequences " tab allows the configuration of the prefixes and sequences of the various Prodon receipts.
 | |
|
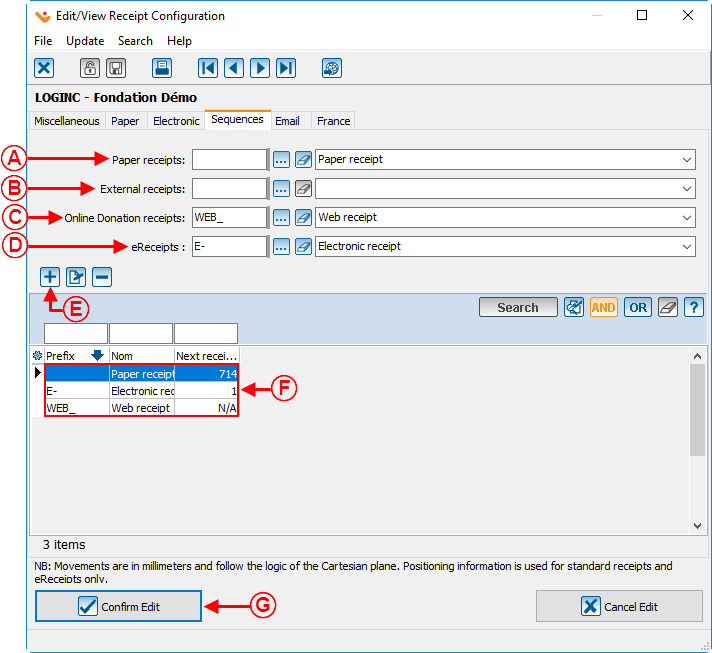
A: Allows the user to add a sequence to the paper receipt format. To do so, the sequence must first be added in F. |
B: Allows the user to add a sequence to the receipts that have been imported into Prodon. To do so, the sequence must first be added in F. |
| C: Allows the user to add a sequence to the Online Donation receipts. To do so, the sequence must first be added in F. | D: Allows the user to add a sequence to the electronic receipts. To do so, the sequence must first be added in F. |
| E: The |
F: This grid is the list of the sequences that where created in Prodon. |
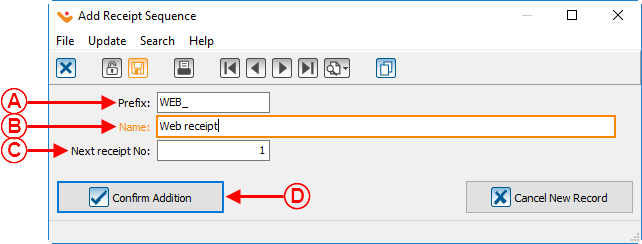
Adding a receipt sequence
" Email " tab
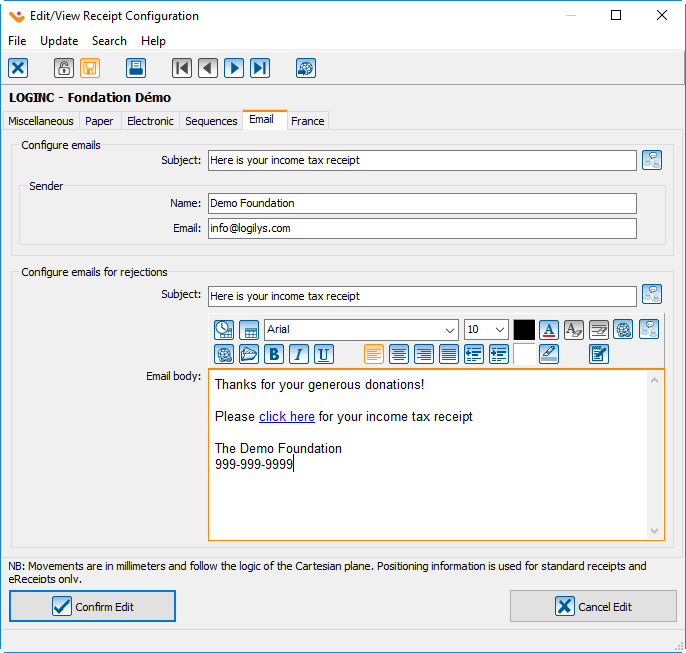
The " Email " tab allows the user to configure the email that will be sent with the receipts. This tab requires the eReceipt Module.
To learn how to configure this tab, consult the section eReceipt.
|
" France " tab
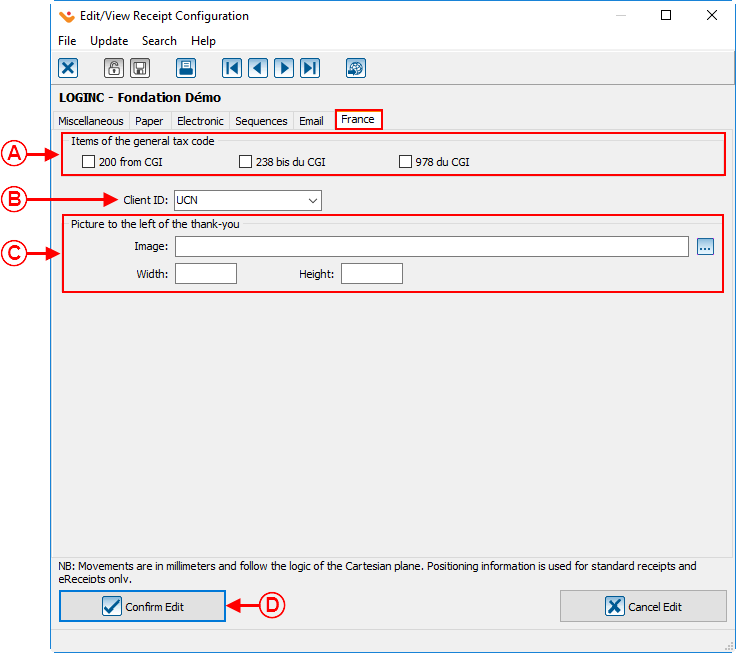
The " France " tab allows the user to configure the french receipts with the standards established by that country.
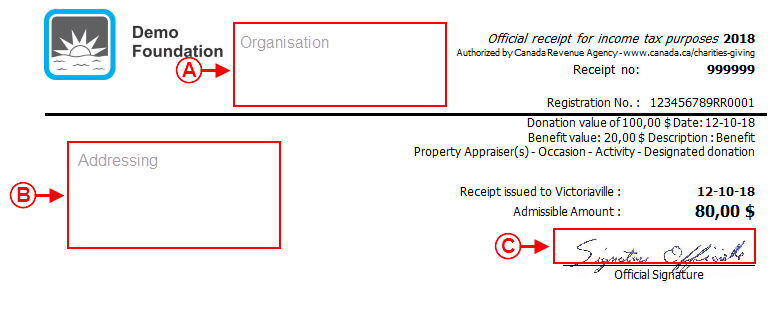
Example of paper receipt option
 | |
|
A: Position of the organization's information. |
B: Position of the client's information. |
| C: Position and size of the official signature. | |
To generate the receipts, consult the Processing Receipt to be Issued procedure.
