ProDon:Transaction Logging
| Transaction Logging |
CAUTION : This document is for ProDon 5. To view ProDon 4 document, click here.
Introduction
ProDon allows transactions of revenues associated with activities that have previously been defined in the "Donation Occasion Management" to be entered.
Once transactions are entered, the user must transfer them, in order to be able to generate documents such as thank-you letters and receipts.
To learn how to transfer a transaction batch, see this document.
CAUTION: To enter transactions with instant payment methods (credit card or bank transfer), the Electronic Transactions Module must be active in ProDon.
For more details on this module or to learn how to enter transactions with PaySafe, click here.
Add Transaction
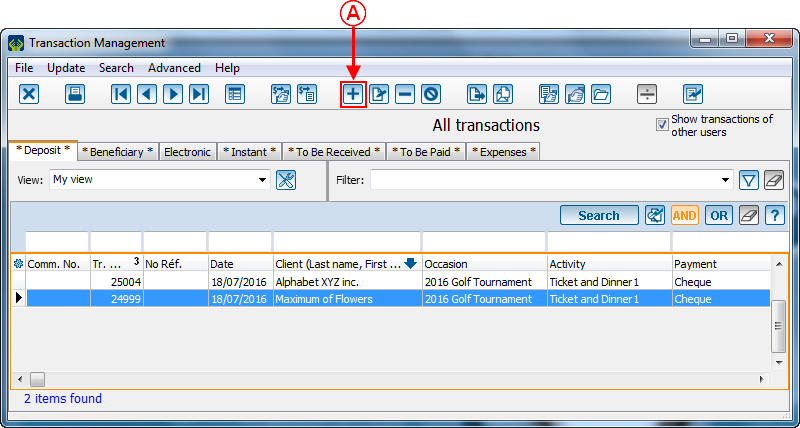
The transaction logging is done in the "Transaction Management".
|
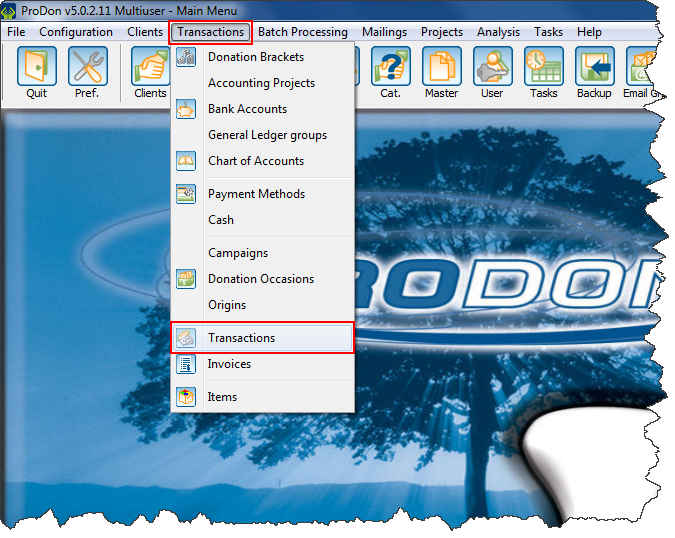
To go to the "Transaction Management", click on the "Transactions" menu, then select " | |
 |
|
The Transaction Management allows the transactions to be entered and transferred in ProDon. To add a new transaction, click on the To learn how to transfer transactions, see this document. | |
Add Transaction
In the "Transaction Management", click on the ![]() button to add a new transaction.
button to add a new transaction.
Selecting a Client for the Addition of a Transaction
|
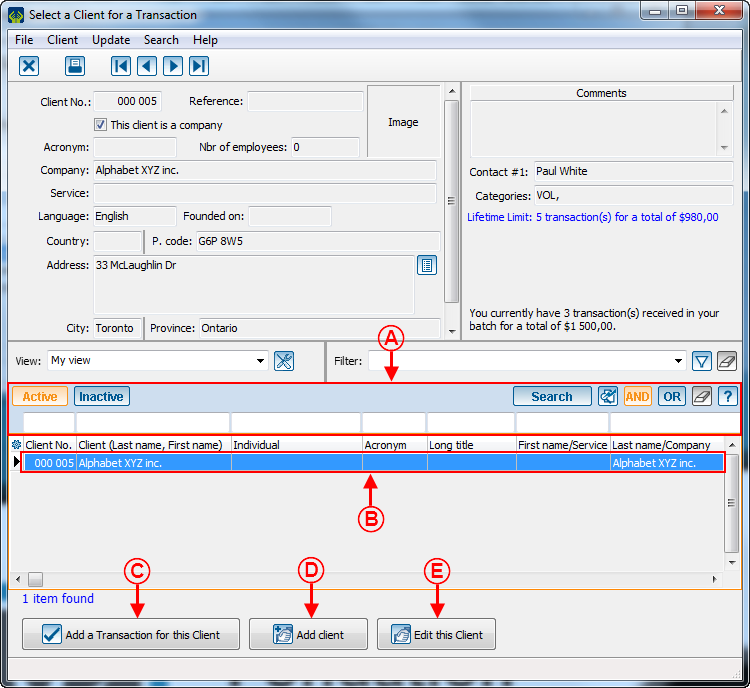
After clicking on the | |
 | |
|
First, look, using the search bar at A, if the client already exists in ProDon. If he or she already exists, select him or her at B, then click on the " If the client does not exist in the database, click on the " To view the file of the client selected at B, click on the " |
Transaction Logging
NOTE: If the client has commitments in progress or pending transactions, see this section.
|
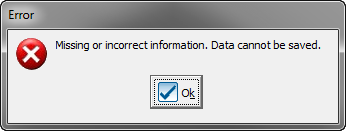
After adding a new client, click on the " | |
|
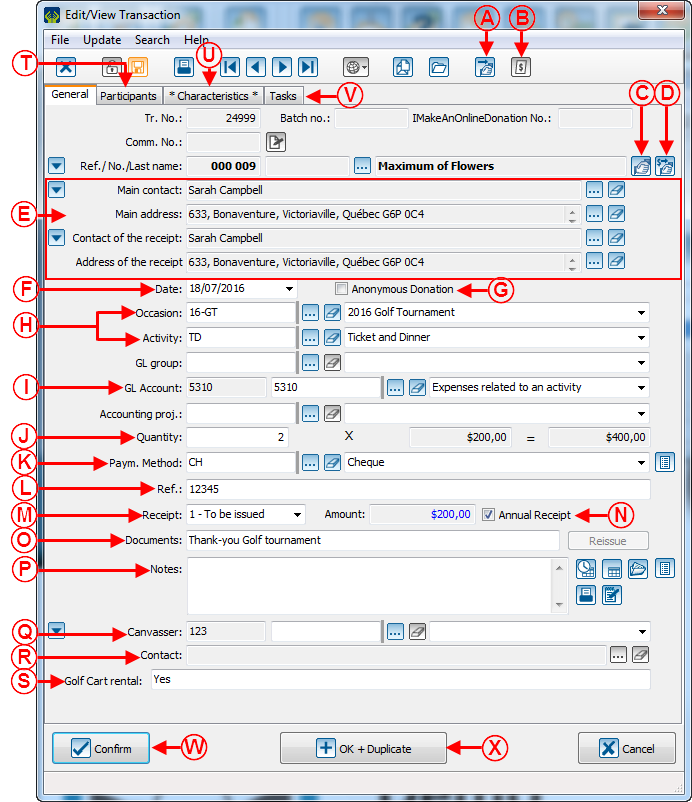
CAUTION: The fields of this window vary according to the type of transaction (standard or with a sale price), depending on whether a third-party donor is assigned to the transaction and also depending on the payment method (cash, cheque, in goods and services donations, etc.) used. Moreover, once the transaction is confirmed, depending on the payment method used, the transaction will be in different tabs of the transaction management. | |
|
A: Allows the assignment of a third-party client to the transaction. |
B: Allows the receipt of the transaction in progress to be printed. In order for this button to be available, the transaction must have previously been saved. |
|
C: Allows the client file of the transaction to be opened. |
D: Allows the assignation of the transaction to a commitment of the client (the Prospecting and Commitments module must be active for this button to be available). |
|
E: Allows the indication of the main contact address. |
F: Allows the indication of the date on which the transaction was made. Caution, this date determines the taxation year of the tax receipt. |
| G: Allows the user to specify that the transaction must remain anonymous. | H: Allows the selection of the donation occasion and the activity for which the transaction was made. |
|
I: Allows the selection of the General Ledger group, the General Ledger account or the accounting project to assign to the transaction. |
J: This field allows the indication of the quantity or the amount of the transaction (depending on the configuration of the activity selected at H). |
|
K: Allows the selection of the payment method used by the donor. Based on the selected payment method (e.g. cheque, goods and services, etc.), some fields may be added. |
L: Allows the payment reference to be entered. |
| M: In order for a receipt to be generated, select the "To be issued" option; otherwise, select none. If the status of the receipt is "To be calculated", it means the value of the benefit was not specified in the configuration of the activity selected at H. The amount of the receipt generated is indicated at the right of the "Receipt" field. | N: In order for the receipt to be generated only at the end of the year, check the "Annual receipt" checkbox. |
|
O: Allows the selection of the documents to be issued for a transaction transfer. |
P: Allows notes related to the transaction to be added. |
|
Q: Allows the selection of a canvasser for the transaction. |
R: Allows a contact for the transaction to be added. |
| S : Allows a custom field to be added. | T: This tab allows the identification of the participants for the transaction. |
| U: Allows the addition of the characteristics applicable to this transaction. | V: This tab allows a task linked to the transaction to be added. |
|
W: By clicking on the " |
X: By clicking on the " |
|
NOTE: It is possible to activate default values in the transaction logging window, in order for the information to always be documented automatically when adding a new transaction. | |
Different types of Transactions :
- Standard Transaction
- Transaction with a Sale Price
- Transaction with a Third-party Client
- Transaction Paid by Cheque
- Transaction in Goods and Services( In-kind)
Standard Transaction
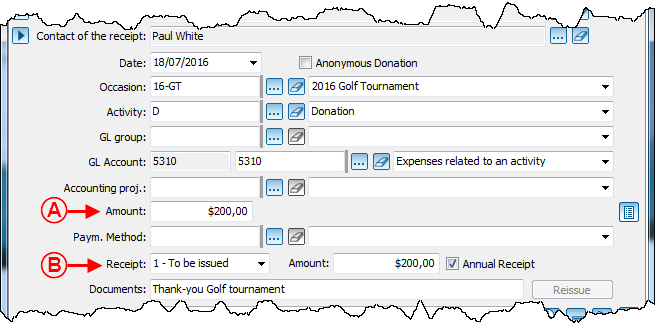
A standard transaction is a transaction made for an activity for which no sale price has been defined in advance.
This type of transaction is mainly used for simple cash donations.
|
A: The amount of the transaction must be entered here. |
B: The amount of the receipt is the same as the transaction's. |
Transaction with a Sale Price
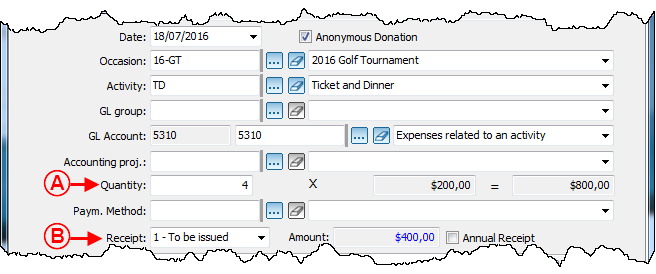
A transaction with a sale price is a transaction made for an activity for which a sale price has been defined in advance.
This type of transaction is used, for instance, for a ticket sale in a fundraising activity.
 | |
|
A: Instead of entering an amount for the transaction, the user must enter the number of tickets sold. The amount of each ticket is entered in the middle ($500.00) and the total amount of the transaction is entered on the right ($2,000.00). The amount for the ticket was determined when creating the activity. |
B: The amount of the receipt is different from the transaction's. In a transaction with a sale price, the person who buys the ticket has an advantage; for instance, a golf round or a dinner, so the amount of the receipt is automatically calculated according to the amount of the benefit specified when creating the activity. |
|
NOTE: For more details concerning the management of donation occasions and activities, click here | |
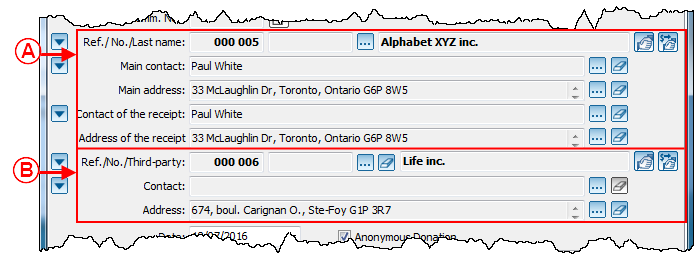
Transaction with a third-party Client
 | |
|
A: This client is the donor. |
B: This client is the third-party donor. |
|
NOTE: To know what a third-party client is, see the "Different Clients of a Transaction" procedure. | |
Transaction Paid by Cheque
 | |
|
A: When the "Cheque" payment method is selected, the "Ref." field is inserted. This field allows the cheque number to be entered. |
Once a transaction paid by cheque is saved, it is found under the "Deposit" tab of the "Transaction management".
Transaction in Goods and Services (In-kind)
|
A: The amount of the transaction is the value of the goods specified at B. |
B: The "Property" field allows the items that were donated to be specified. |
|
C: The "Appraiser(s)" field allows the name of the company or the person who appraised the items specified at B to be entered. |
D: The amount of the receipt is usually the same as the value of the item specified at A. |
Once a donation in goods is saved, it is found under the "Deposit" tab of the "Transaction management".
If the Client has a Commitment in Progress or a Pending Payment
NOTE: If the client does not have any commitment in progress nor pending transactions, see this section.
|
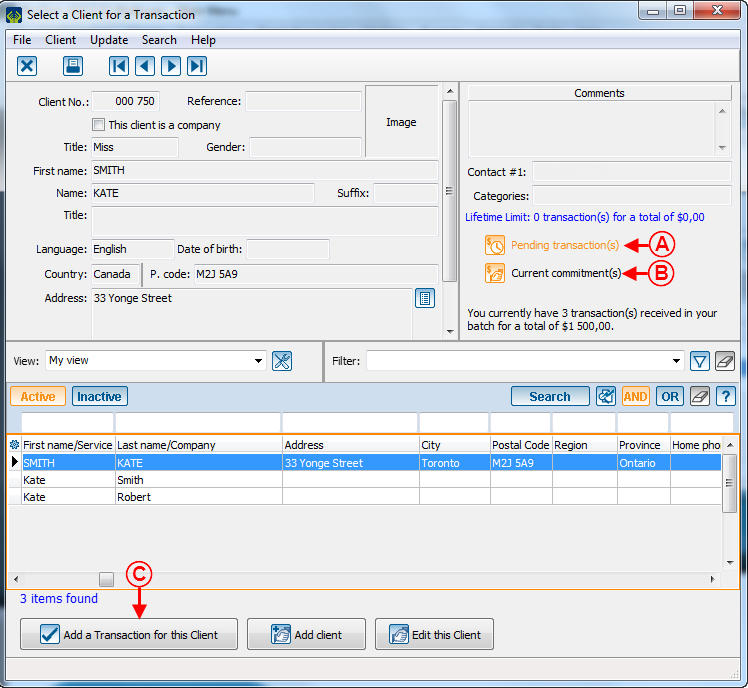
A: If the selected client has a pending transaction, the " |
B: If the selected client has a commitment in progress, the " NOTE: The "Prospecting and Commitments module" must be activated in the database in order for the clients to be able to have current commitments.
|
|
C: To assign a transaction to a current commitment or to a pending transaction of the selected client, or to add a transaction that do not have any current commitment or pending transaction of the selected client, click on the " |
|
|
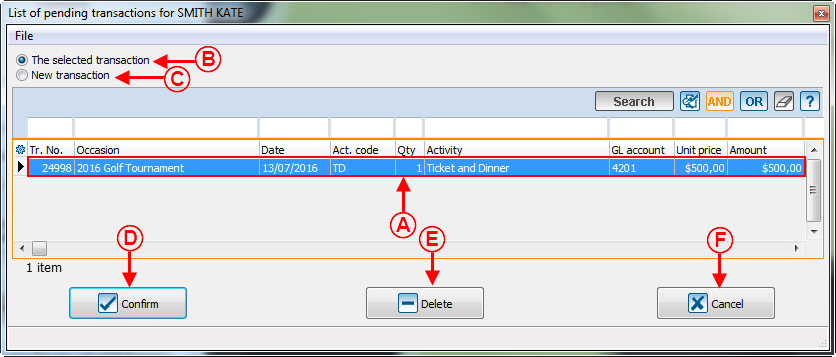
After clicking on the " | |
|
A: To assign the transaction to a commitment in progress, click on the "Commitment(s)". After clicking on that button, this window opens. |
B: To assign the transaction to a pending transaction, click on the "Transactions" button. After clicking on that button, this window opens. |
|
C: To create a new transaction without assigning it to current commitments or to pending transactions of the client, click on the "New transaction" button. After clicking on that button, this window opens. |
D: To return to the client selection window, click on the "Cancel" button. |
|
NOTE: If, for instance, the client only has one or more commitment(s) in progress and no pending transaction, the "Transactions" button will not be visible. If, on the other hand, the client only has one or more pending transaction(s) and no commitment in progress, the "Commitments" button is visible. | |
Current Commitments
|
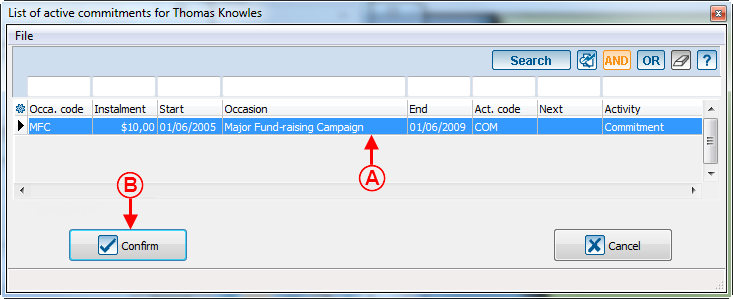
After clicking on the "Commitment(s)" button, the following window opens. | |
 | |
|
A: If the client has many commitments in progress, select the commitment to which the transaction should be assigned. |
B: After selecting the right commitment, click on the " |
Pending Transaction(s)
Document name: ProDon:Transaction Logging
Version : 5.0.2.9
