ProDon:Participant Management
Contents
[hide]Introduction
It is possible to manage the participants for the different fundraising activities.
Example:
The Logilys company purchases 4 tickets for a golf tournament.
The transaction will be carried out on behalf on this company, which is the payer, and the name of each player will be entered in the participants section. Note that these participants may or may not be in the database.
Thereafter, it will be possible to produce and print participants lists and reports for each activity.
Activity configuration
From the "Donation occasion" management, select the line of the activity and double-click to open the "Edit/View activity" window, then click on "Participants" in order to activate the participant management.
It is possible to add fields to document specific options for an activity (e.g. table number, shotgun start, golf ball colour, etc.). Simply name the option label (e.g. "dinner table").
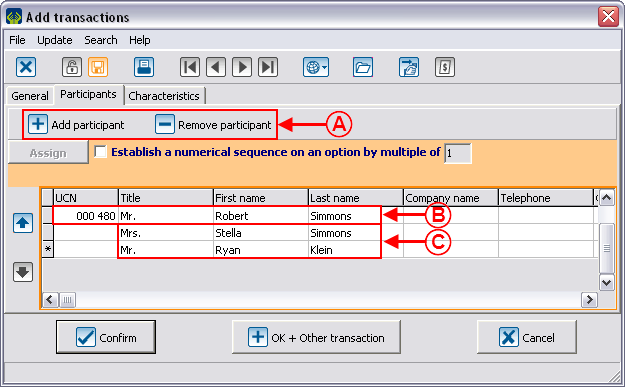
Add participants
Following the activation of the participant management for an activity, the "Participants" tab becomes available during a transaction addition for this activity.
There are two types of activities: the "Standard" type and the "Sale price" type. Click here to learn more.
If the activity is of "Sale price" type, you first have to enter a quantity in the "General" tab of the transaction to obtain an equivalent number of lines to the number of participants to enter (e.g. 3 tickets sold = 3 lines to add participants).
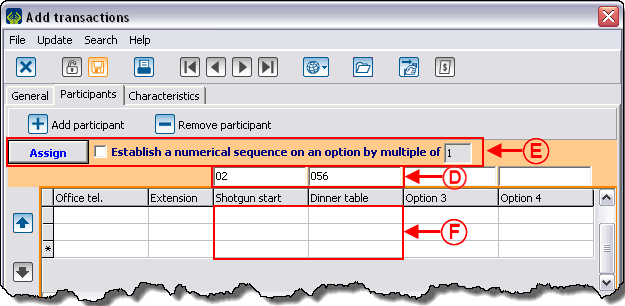
If the option labels have been named during the activity configuration, the columns "Option 1", "Option 2", "Option 3" and "Option 4" will automatically have the names they were attributed earlier.
In the following example, the "Option 1" field has been replaced for "Shotgun start" and the "Option 2" field has been replaced for "Dinner table".
Viewing and printing participants lists or customized reports
From the "Analysis & History" management, go in the "Participants" tab.
| File:Participant management 003.png | |
|
A: It is the search bar to find the participants. In this example, the "Golf tournament 2011" search, which is based on the "Occasion" column, allows you to see all the participants for this donation occasion. It would have also been possible to search "Dinner" in the "Activity" column to see everyone who has a ticket for dinner at the Golf tournament 2011. |
B: From the search result, it is possible to create a list or a report by using the "Customized reports". To do so, click on the |
|
C: It is also possible to export data in Excel. To do so, click on the |
|
Document name: ProDon:Participant Management

