ProDon:In Memoriam Donation
| In Memoriam Donation |
CAUTION: This document is for VERSION 5 of Prodon. To go to the document for version 4, click here.
Introduction
This document explains the establishment of the In Memoriam gift structure which allows you to manage simple or even complex donations and it also offers the possibility to manage follow-up with the families.
Configuration
Configuration of the Master Documents
There are two documents to be issued upon reception of an In Memoriam gift: the thank-you letter to the donor and the letter to the family.
Thank-you Letter to the Donor
The thank-you letter to the donor is a letter that is sent to the donor to thank him/her for the donation received and to mention that the family of the deceased will be notified for the donation made in memory of the deceased person. The difference between the " standard thank-you letter " and the " thank-you letter to the donor of an In Memoriam gift " is in the use of the merge fields.
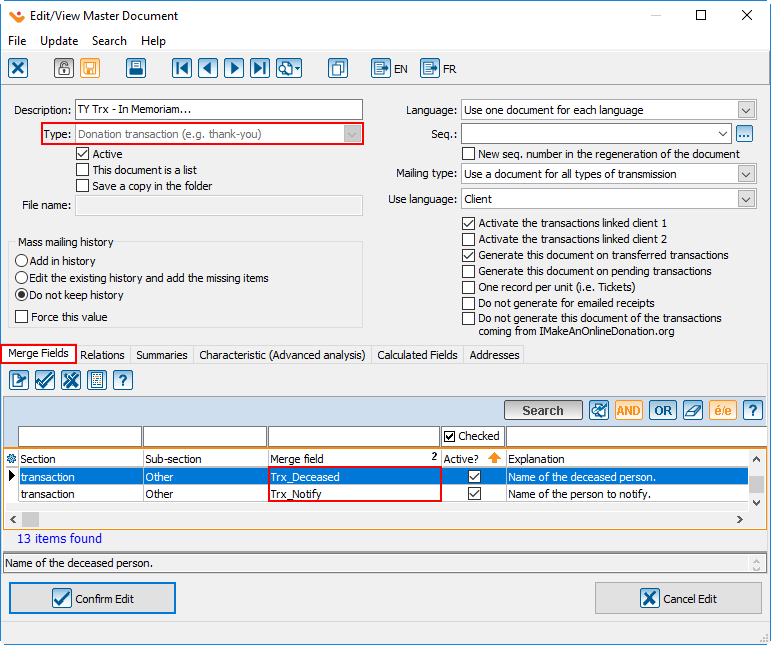
In order to create the master document, you need to choose the " Donation transaction " type of document so that the " Deceased " and " Notify " merge fields become available. These fields contain the long greeting of the deceased and of the person to notify for the donations received. In the thank-you letter sent to the donor, it will be written that the donation in memory of " Deceased " has been received and that " Notify " will be notified of the donation.
|
For more details concerning the master documents, consult the " Master Document Management ".
Letter to the Family
The letter to the family is meant to inform the family of the list of individuals who have made a donation in memory of the deceased person. It is also a way to thank the family for suggesting that people in making an In Memoriam gift.
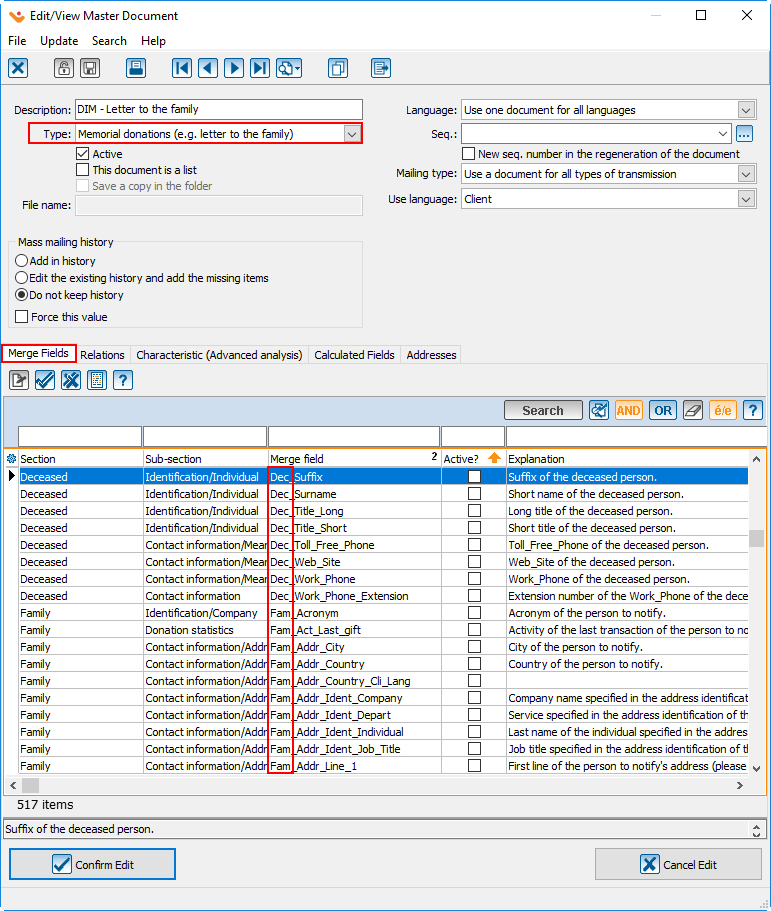
In order to create a master document, you need to choose the " Memorial donations " type of document. This type of document contains two series of merge fields: The fields related to the information from the file of the person to notify (merge fields starting with Fam_) and the fields related to the information from the file of the deceased (merge fields starting with Dec_). When writing the letter, more information concerning both parties will then become available.
|
Adding a Donation Occasion (particularly for the In Memoriam Gifts)
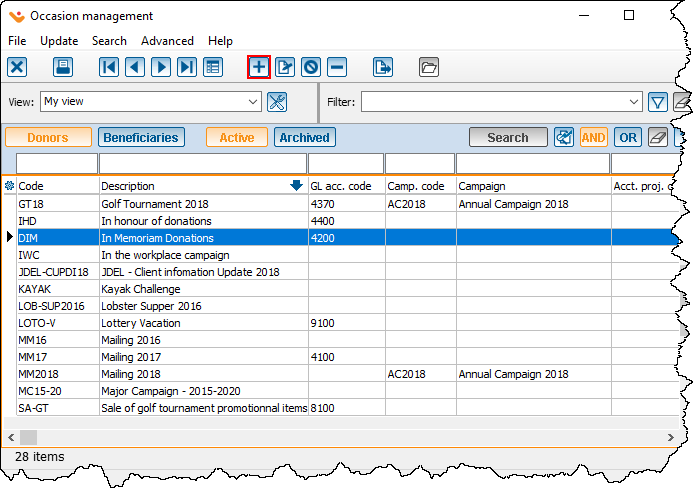
From the software home page, click on " Transactions ", then select " ![]() Donation occasion ".
Donation occasion ".
| After clicking on " |
|
| After clicking on the | |
| |
|
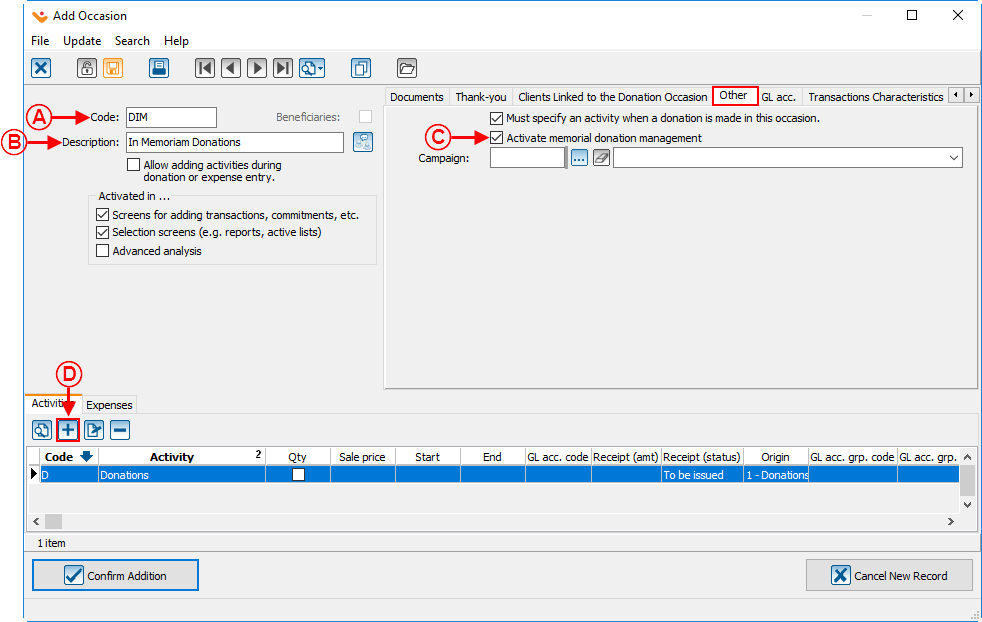
A: Give the occasion a code. |
B: Name the occasion. |
|
C: Check the box "Activate memorial donation management ". |
|
Adding an Activity
| |
|
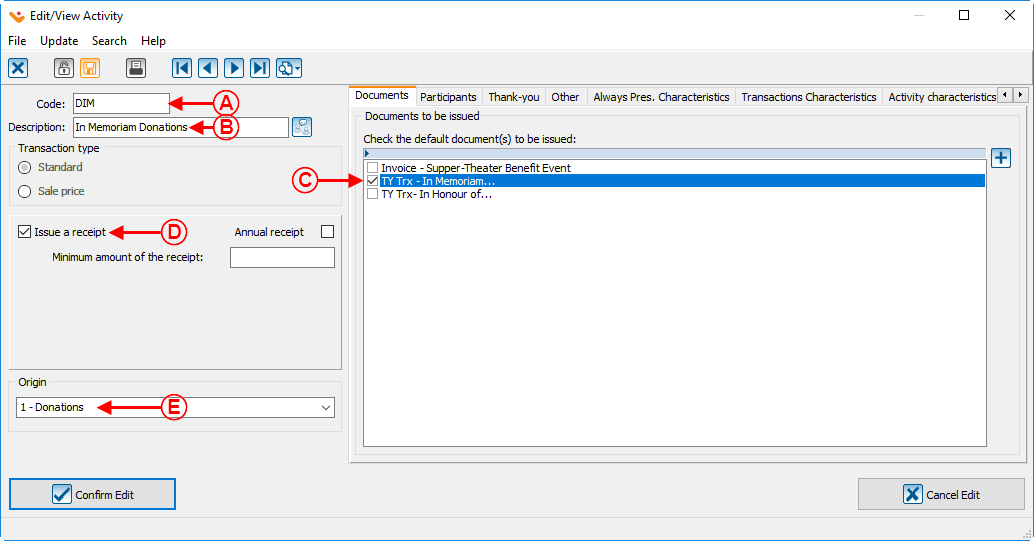
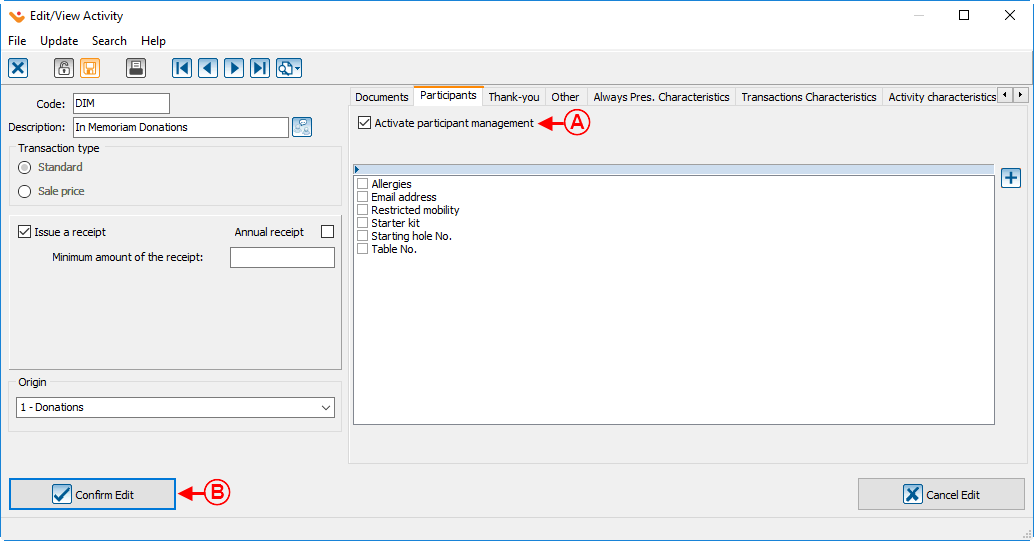
A: In the " Participants " tab, check the box " Activate participant management ". |
|
|
NOTE: The option " Activate participant management " allows a donation to be entered by a donor who wants to indicate that the donation is made on the behalf of other people as well. Click here for more details. | |
Transaction Logging
To enter an In Memoriam gift transaction, open the transaction management.
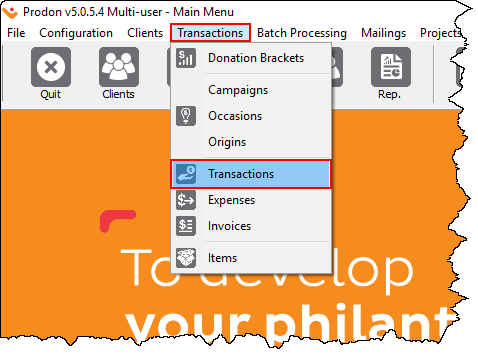
In the transaction management window, click on the| From the software home page, click on " Transactions ", then choose " |
 |
In the transaction management window, click on the ![]() button.
button.
Select the client who has made the donation, and click on "![]() Add a transaction for this client".
Add a transaction for this client".
In the "Add transactions" window, select the "In Memoriam gift" donation occasion created earlier, then when the occasion is selected, the "Memoriam" tab will appear at the top of the window.
The user also needs to select the activity that has been created earlier for which the participant management was activated, then the "Participants" tab will appear right next to the "Memoriam" tab.
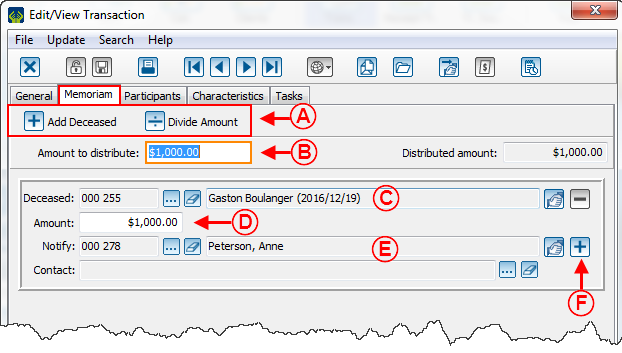
Finish filling out all the fields of the "General" tab, then go in the "Memoriam" tab.
For more details concerning transaction registration, consult this procedure.
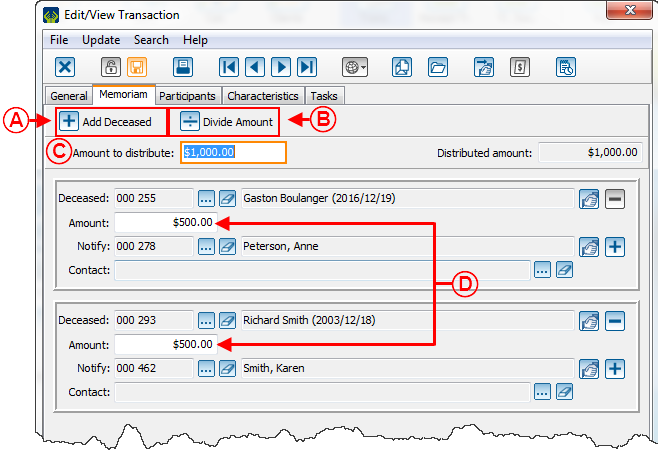
Memoriam Tab
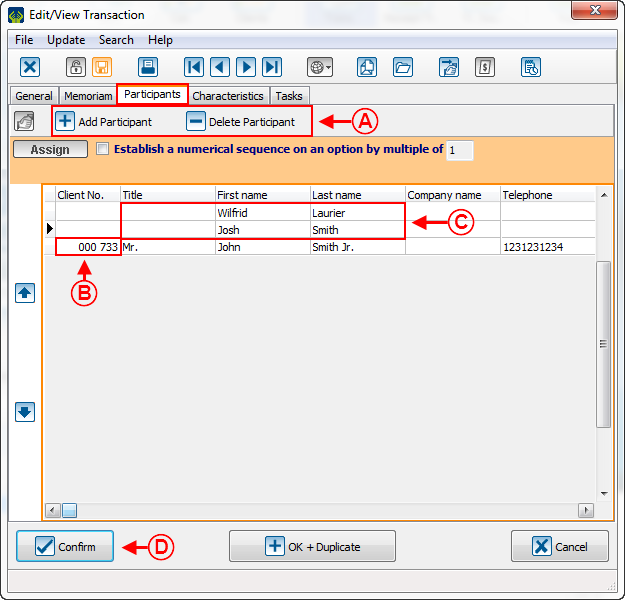
Participants Tab
In this tab, it is possible to include additional markings to send to the family. For example, if a company makes a donation and wishes that the names of the three employees who participated in the gift should be mentioned on the list that will be sent to the family.
Transaction Transfer
| |
|
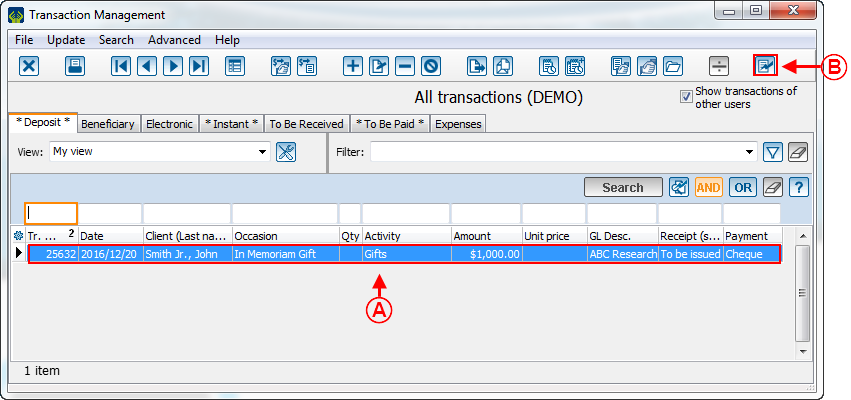
A: Here is the transactions list to transfer. |
|
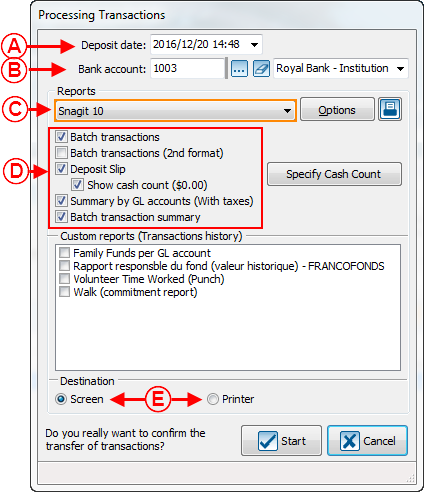
The following window opens after clicking on the ![]() button at the previous step B.
button at the previous step B.
Printing the Thank-you Letter to the Donor
The thank-you letter to the donor of a Memoriam gift is generated at the same place as every other usual letter.
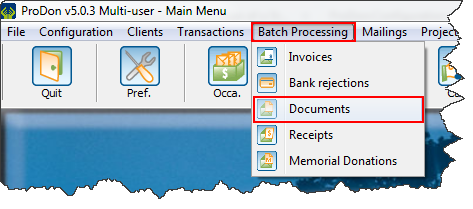
From the software homepage, select "Batch processing", then select "![]() Documents".
Documents".
For more information concerning the processing of the documents to issue, consult this procedure.
Letter and Follow-ups with the Families
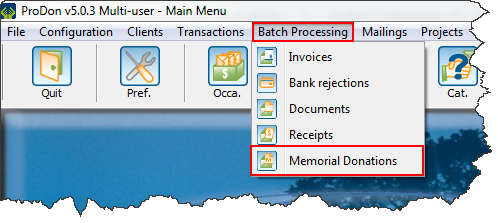
From the software home page, select "Batch processing", then choose "![]() Memorial gifts".
Memorial gifts".
Follow-up Management
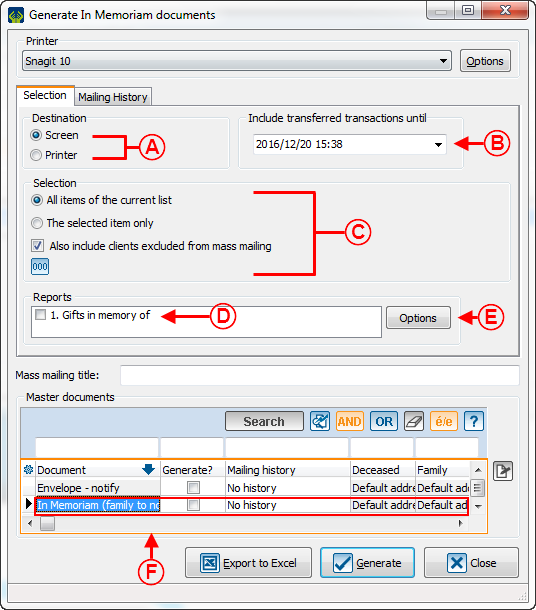
Preparing the Follow-up Documents for the Family
This window opens after clicking on the ![]() button at the previous step F.
button at the previous step F.
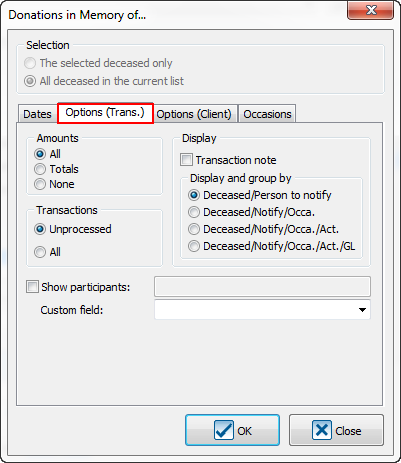
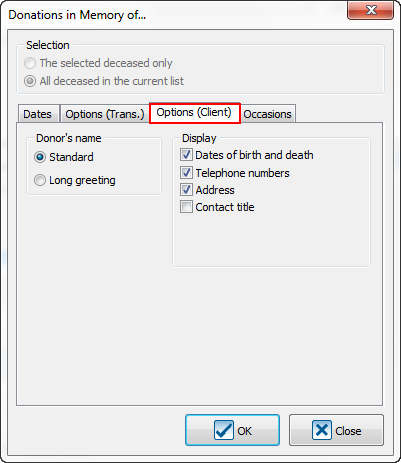
Here is the list of the most currently used options, it is also possible to choose other configurations to adapt the list if needed.
|
|
When the options are configured in the "Options (trans.)" tab and in the "Options (client)" tab, click on "![]() OK".
OK".
Here is a sample report obtained using the previous options:
Document name: ProDon:In Memoriam Donation
Version : 5.0.3
