Difference between revisions of "ProDon:Bank Rejections"
Jguillemette (talk | contribs) (→Cancel all transactions) |
Jguillemette (talk | contribs) (→Cancel all transactions) |
||
| Line 165: | Line 165: | ||
|- | |- | ||
| − | | colspan="2" | Once all | + | | colspan="2" | Once all steps finished, this window will open: |
|- | |- | ||
Revision as of 12:31, 7 December 2016
| Bank Rejections |
Contents
[hide]- 1 Introduction
- 2 Importing bank rejections
- 3 Cancel all transactions
- 4 Cancel all transactions and reactivate the token
- 5 Cancel all transactions and replace the token
- 6 Renew the transactions and reactivate the token
- 7 Renew the transactions and replace the token
- 8 Reactivate the token
- 9 Replace the token
- 10 Mark as ignored
- 11 Error code grid
Caution : This document is currently revised, it is possible that some parts are missing or outdated.
Introduction
Sometimes, it happen that a direct debit PaySafe transaction may be rejected. A bank reject is at least a transferred or an untransferred transaction, linked to a commitment or not, linked to a direct debit PaySafe token. No matter the reject reason, the transaction will get an error code and you will have to process this rejection with the help of ProDon's functions. Depending of the bank reject type, you will get different possibilities. You must have the Electronic Transaction module to access bank rejection.
Importing bank rejections
| |
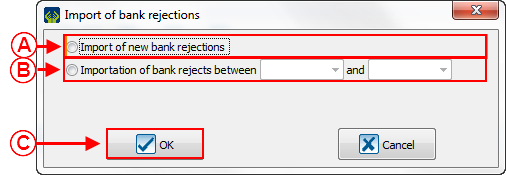
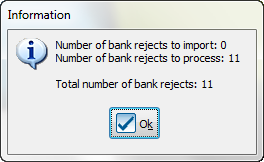
| At the opening of ProDon, if you have bank rejects to import, this window will pop up. |
| |
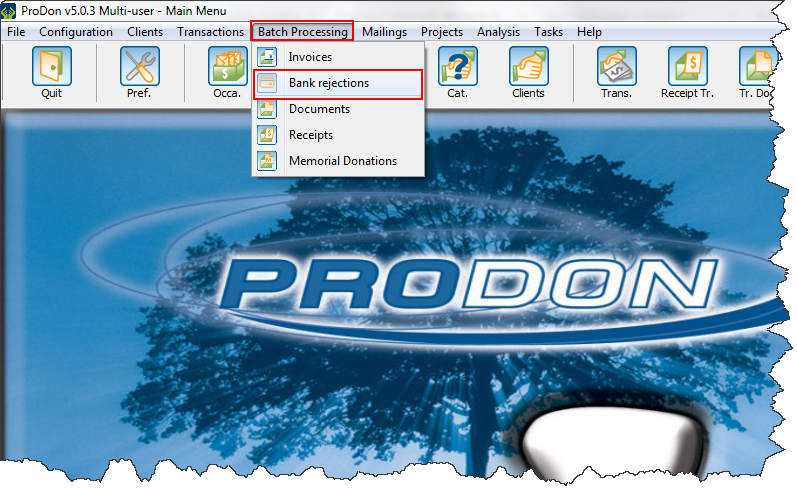
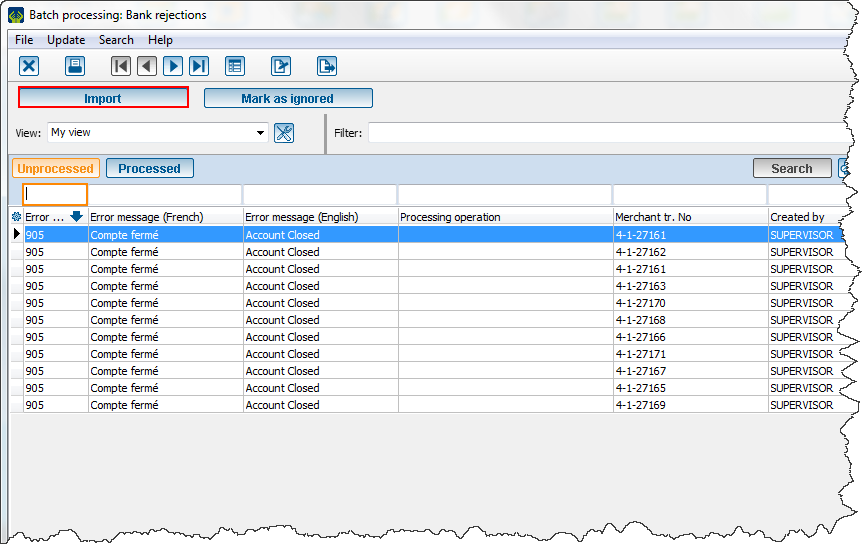
| To process the bank rejects, you will have to go to the "Batch Processing" tab and select "Bank rejections". |
| |
| In this window, you will see the "Import" button at the left. To import rejects, click on it. |
| |
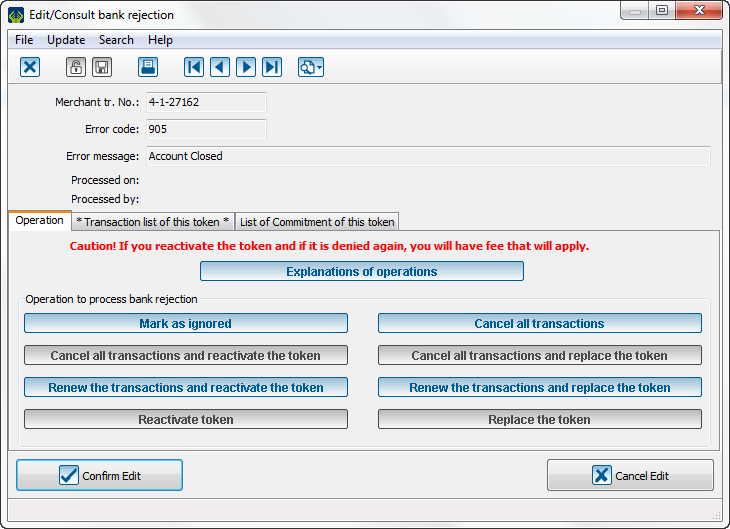
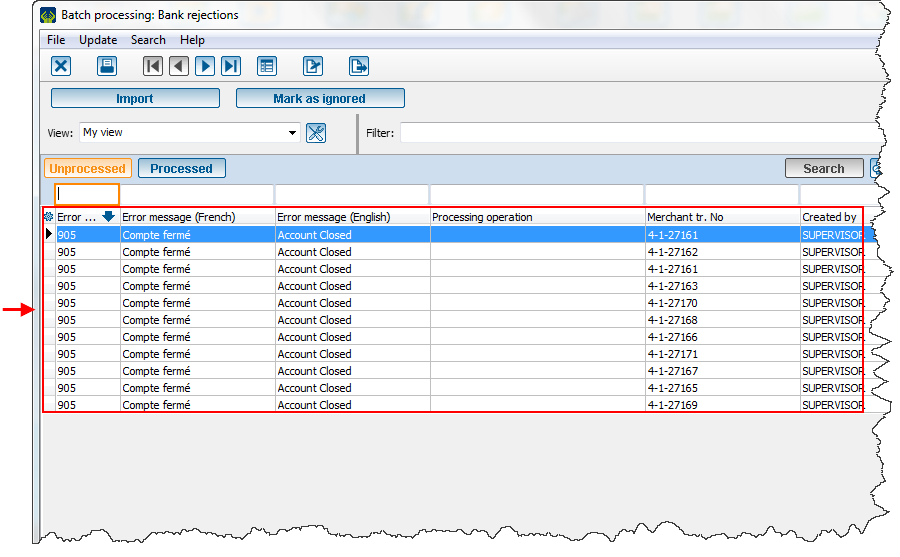
| To process a reject, you will have to select the reject that you want to process in this window. Be sure that you have hilighted the
|
Cancel all transactions
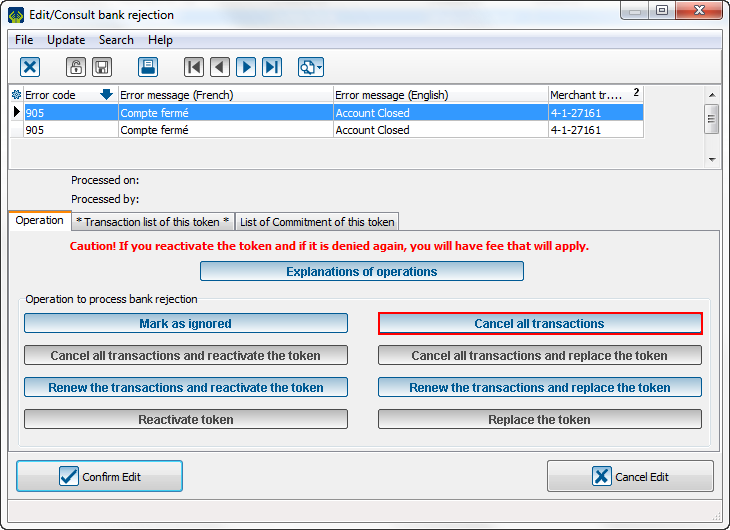
The "Cancel all transactions" button is available as soon as there is at least a transaction without commitment. For example, a client make a donation directly on your website, but this donation is not linked to a commitment and is rejected. This function will cancel all transactions related to a precise token.
| |
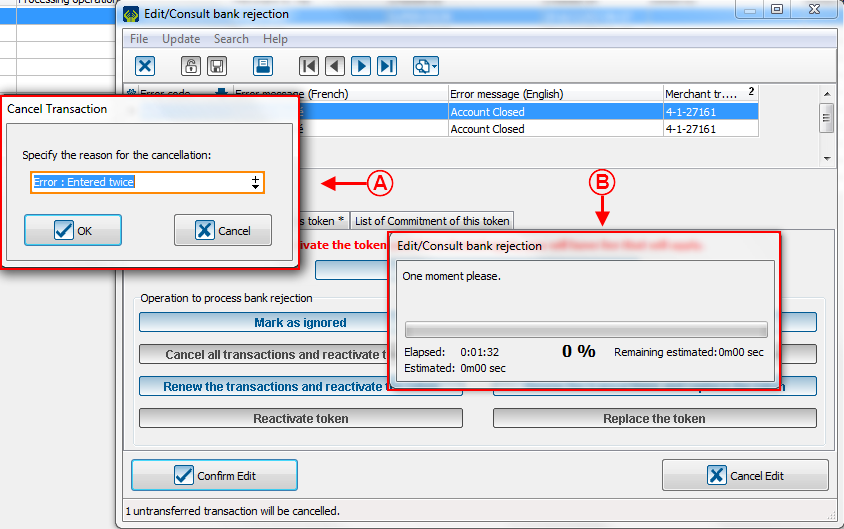
| From this window, click on "Cancel all transactions". |
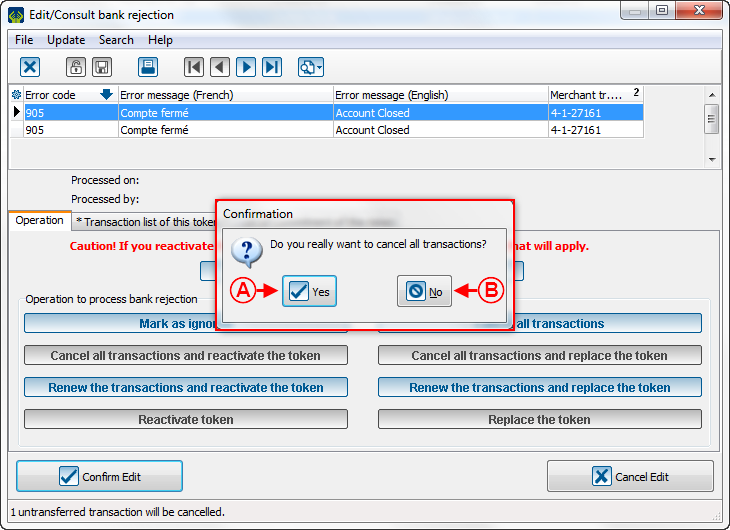
| Then, this window will open: | |
| |
|
A: If you click on "Yes", you will move to the next step. |
B: If you click on "No", you will go back to the last step. |
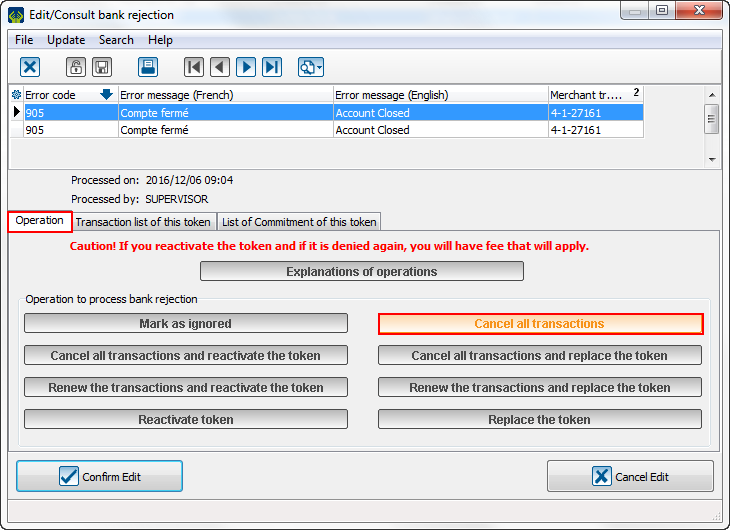
| Once all steps finished, this window will open: | |
| |
| Caution: See that the selected function is highlighted and all other functions are locked. |
Cancel all transactions and reactivate the token
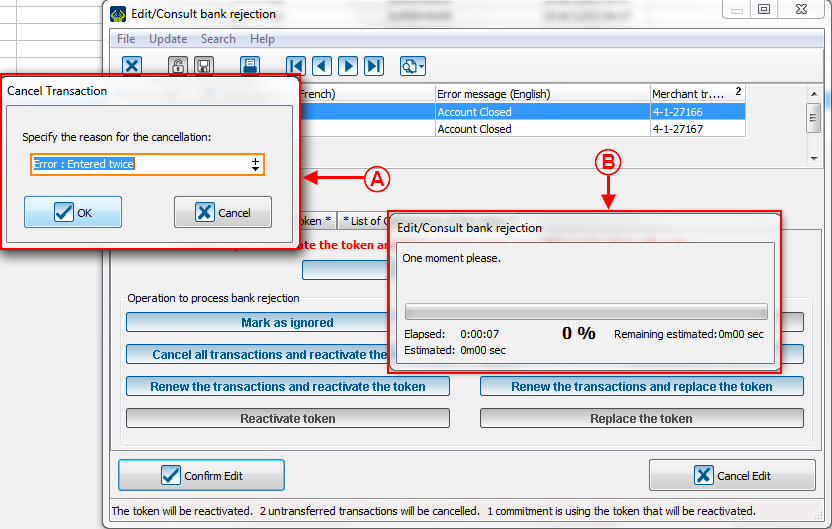
The "Cancel all transactions and reactivate the token is available as soon as there is at least a transaction and a commitment. For example, the automatic instalment comes on Non-Sufficient Funds (NSF) in the client's account for his/her commitment. This function will cancel all transactions linked to this token and it will reactivate it. By reactivating it, it will be usable again.
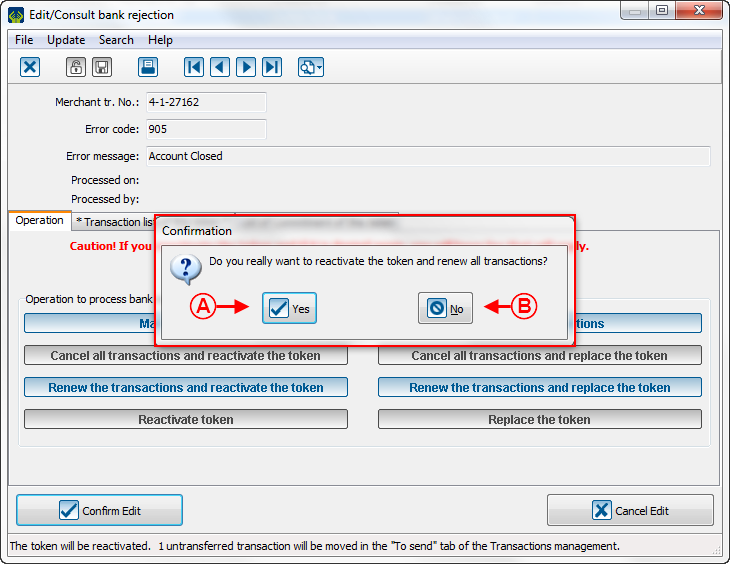
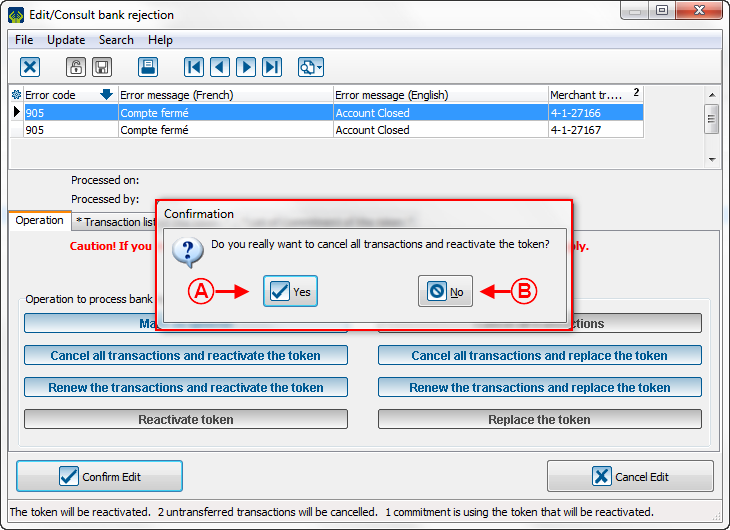
| Then, after clicking on the button, this window will open: | |
| |
|
A: If you click on "Yes", you will continue to the next step. |
B: If you clik on "No", you will go to the last step. |
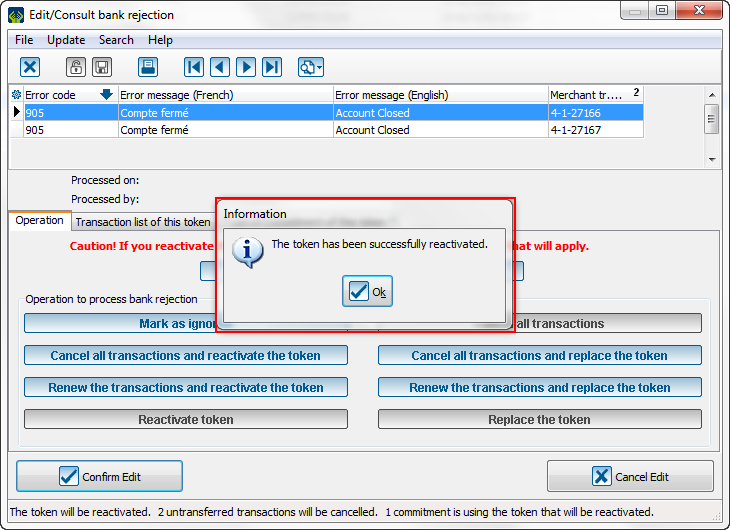
| Then, this message will appear to confirm the token reactivation: | |
| |
| Click on "Ok" to continue. |
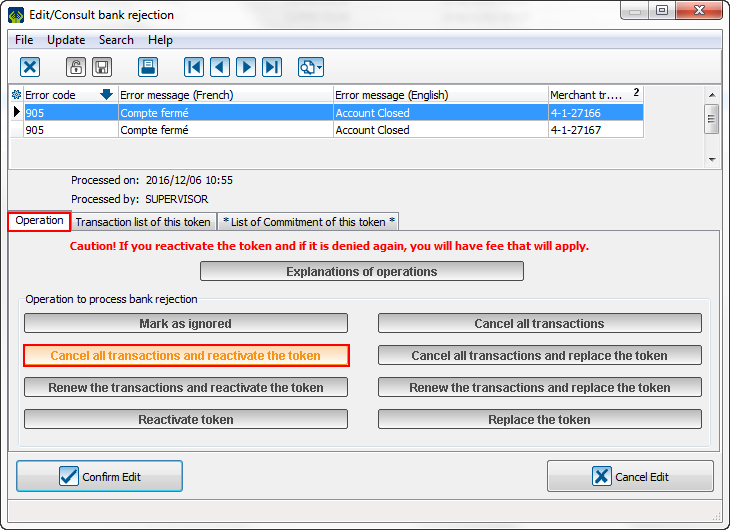
| Once all steps finished, this window will be displayed: | |
| |
| Caution: See that the selected function is highlighted and all other functions are locked. |
Cancel all transactions and replace the token
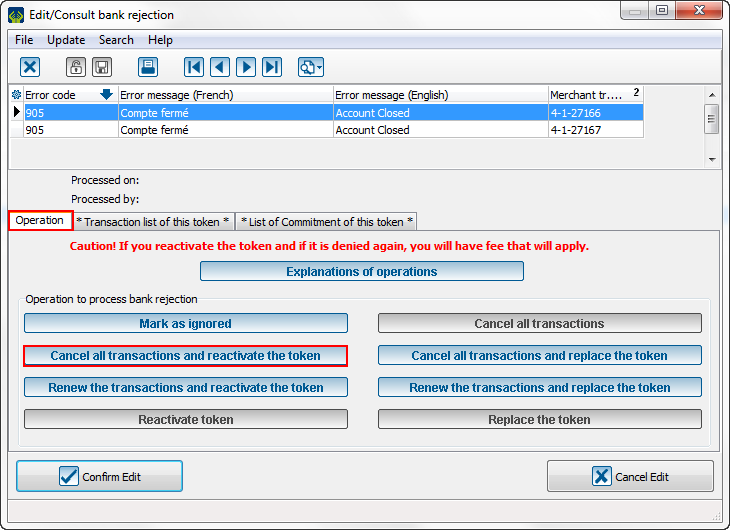
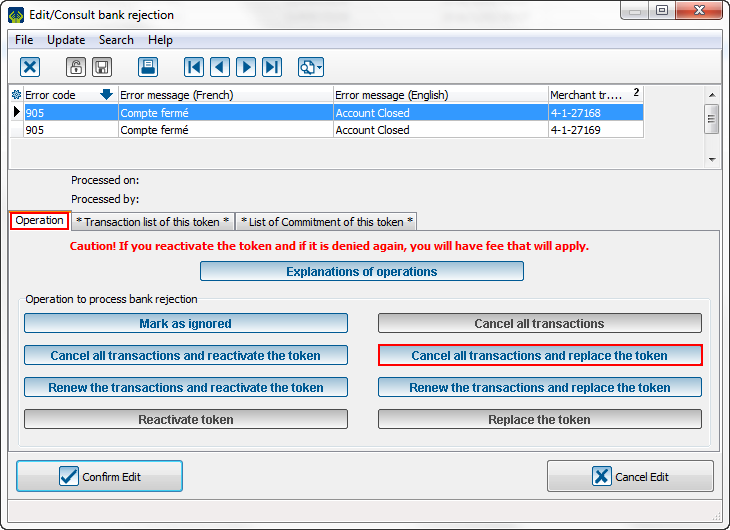
The "Cancel all transaction and replace the token" button is available as soon as there is at least a transaction and a commitment. For example, the automatic instalment create a reject telling the account is closed. This function will cancel all transaction linked to this token and replace it. You will have to enter new bank information to link a new account to the client.
| When the reject window open, you will have these options: | |
| |
| To cancel all transactions and replace the token, you must select the button in question. |
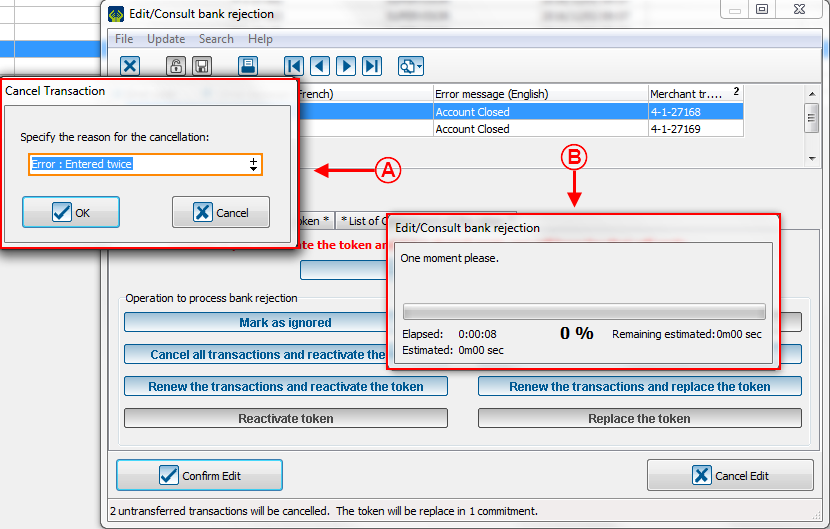
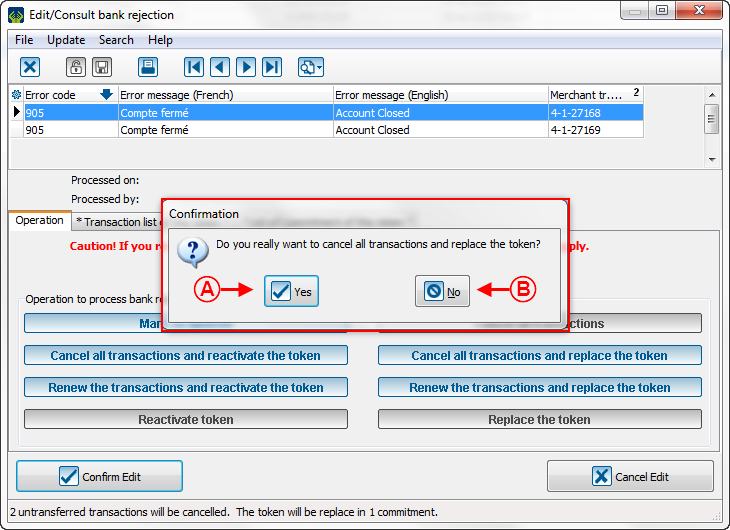
| Then, after you have clicked on the button, this window opens: | |
| |
|
A: If you click on "Yes", you will continue to the next step. |
B: If you click on "No", you will go back to the last step. |
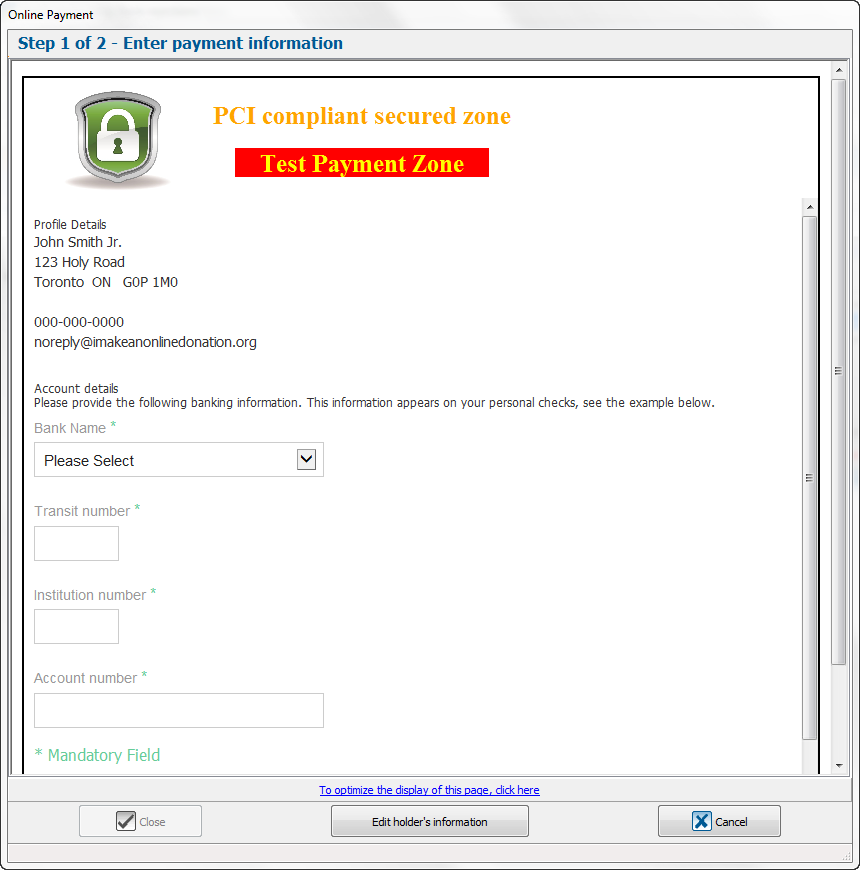
| Then, this page opens to allow you to create a new token which will replace the old one: | |
| |
| You must enter the bank information of the client to continue. |
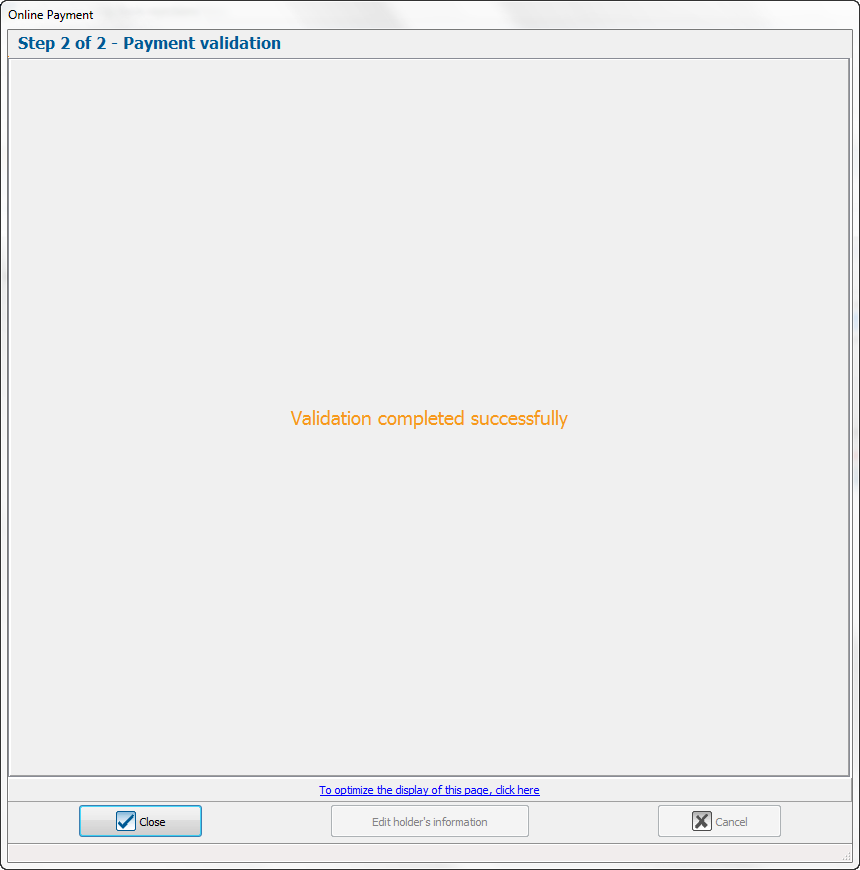
| The validation page is displayed if the information entered before are valid: | |
|
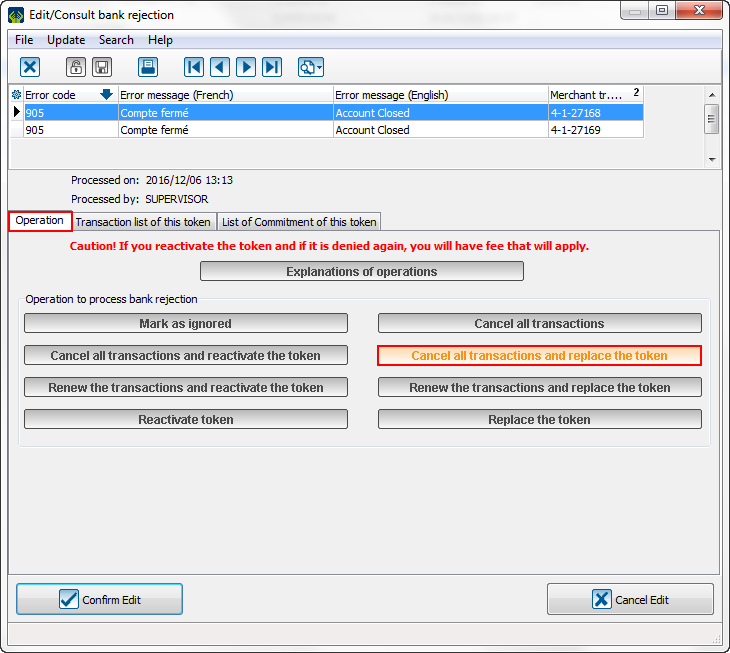
| Once all steps finished, this window opens: | |
| |
| Caution: See that the selected function is highlighted and all other functions are locked. |
Renew the transactions and reactivate the token
The "Renew the transactions and reactivate the token" button is available as soon as there is a transaction. For example, the transaction has been rejected, the client add some money in his account, he contact you to tell you to redo the transaction in the same account. This function will redo the transactions and reactivate the token. These transactions will be passed in the same account.
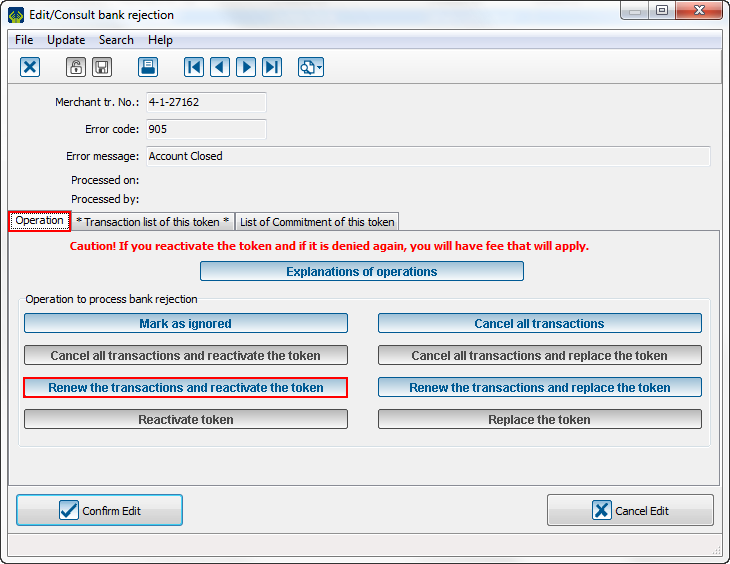
| When the reject window open, you will have these options: | |
| |
| To renew the transactions and reactivate the token, you must select the button in question. |
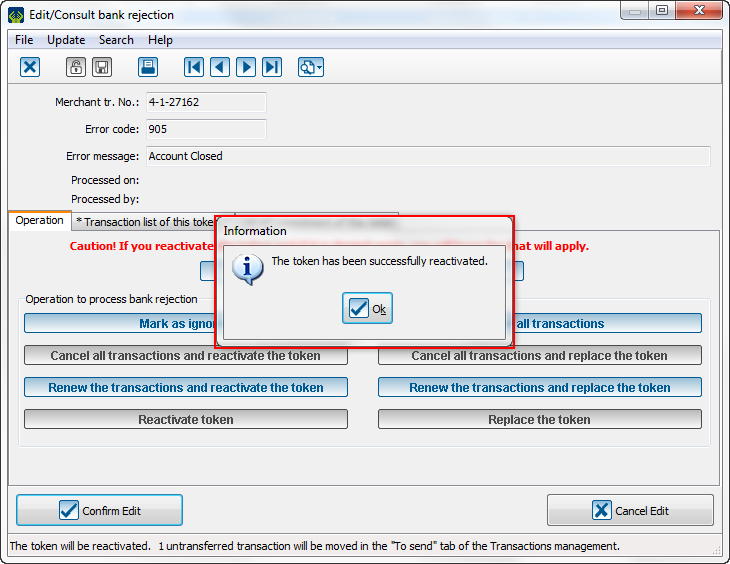
| So, this message will pop-up to confirm the reactivation of the token: | |
| |
| Click on "Ok" to continue.
|
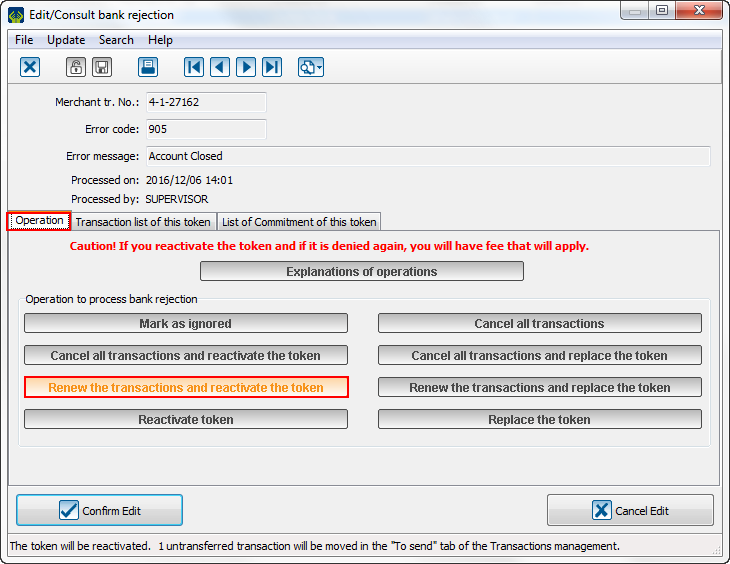
| Once all steps finished, this window will be displayed: | |
| |
| Caution: See that the selected function is highlighted and all other functions are locked. |
Renew the transactions and replace the token
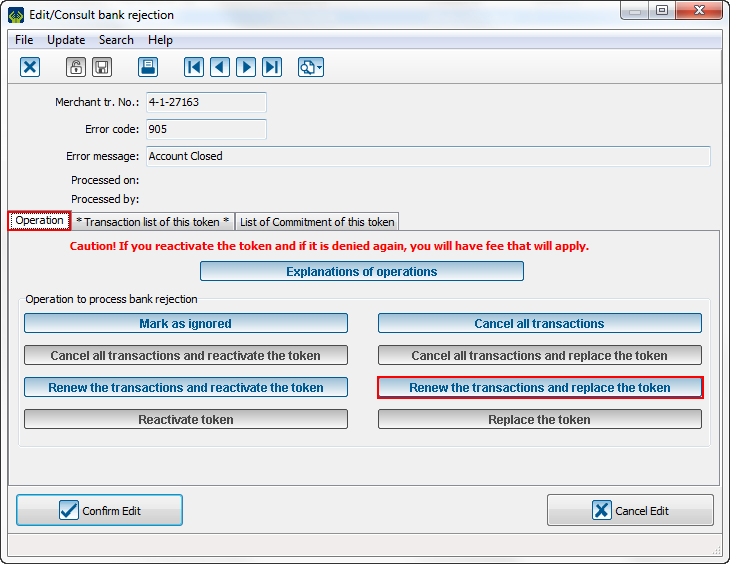
The "Renew the transactions and replace the token" button is available as soon as there is a transaction. For example, the transaction has been rejected, the client has change his account and contact you to give his new information and tells you taht you can redo the transaction in this new account. This function will redo the transactions and will replace the token. Then, the transactions will be done in this new account.
| When the reject window open, you will have these options: | |
| |
| To renew the transactions and replace the token, you must select the button in question. |
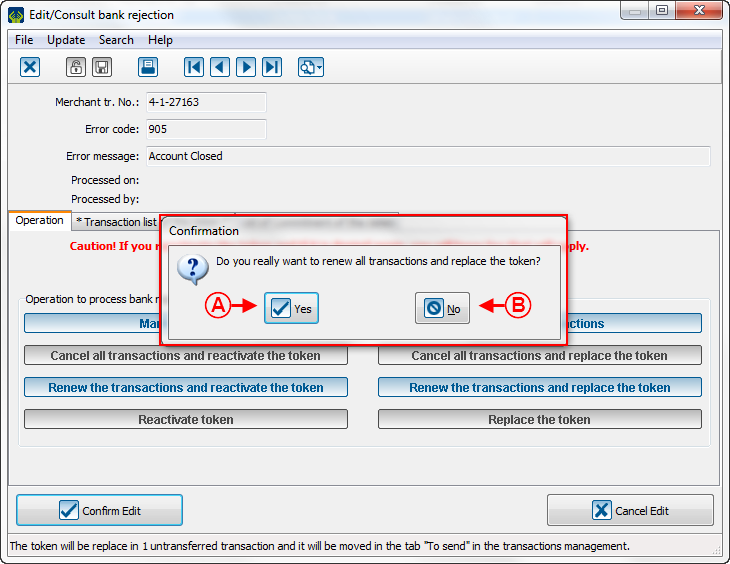
| Then, after clicking on the button, this window will open:
| |
| |
|
A: If you click on "Yes", you will continue to the next step. |
B: If you click on "No", you will go back. |
| Then, this page opens to allow you to create a new token which will replace the old one: | |

| |
| You must enter the bank information of the client to continue. |
| The validation page is displayed if the information entered before are valid: | |

|
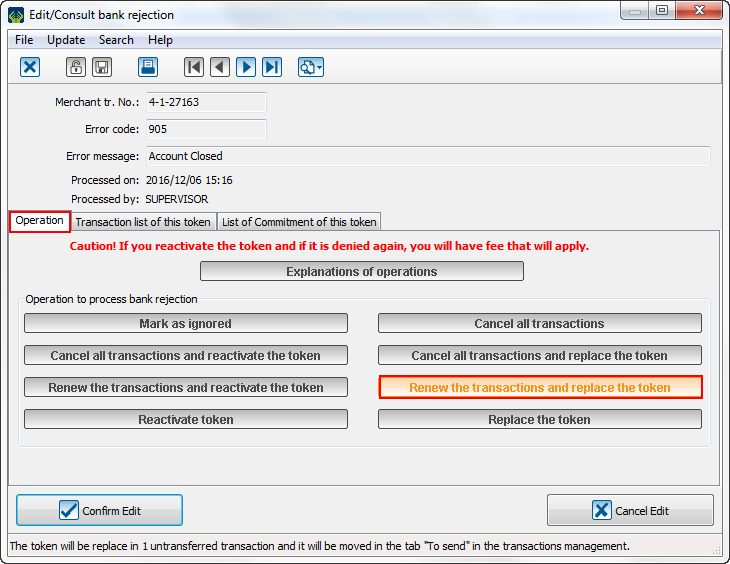
| Once all steps finished, this window opens: | |
| |
| Caution: See that the selected function is highlighted and all other functions are locked. |
Reactivate the token
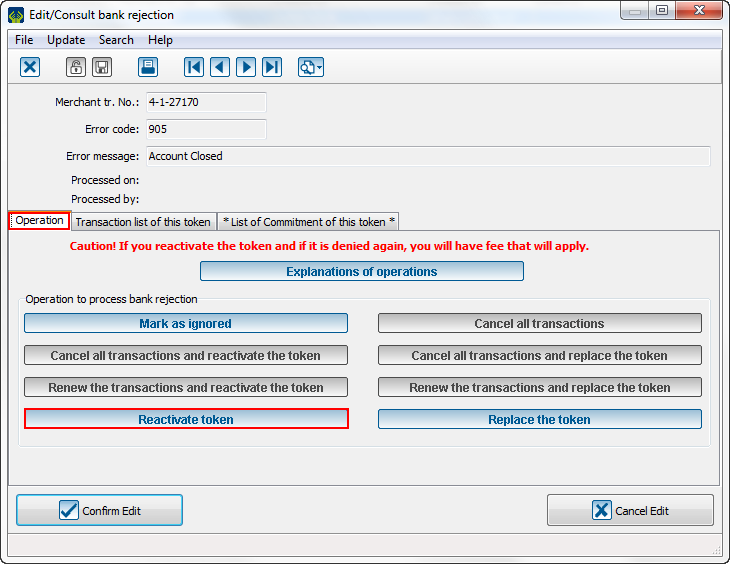
The "Reactivate the token" is available as soon as there is a commitment without transaction. For example, the transaction has been rejected, the client contact you to cancel it, but she ask you to keep the same bank information, so you must reactivate them.
| When the reject window opens, you will have these options: | |
| |
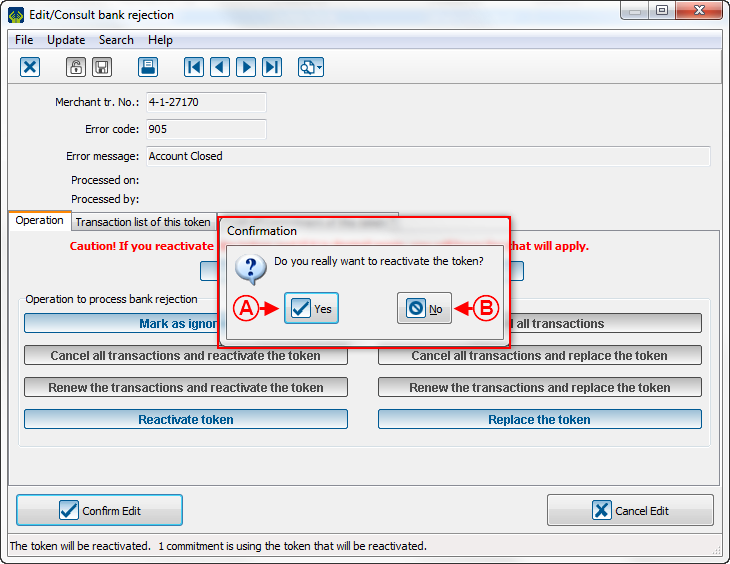
| To reactivate the token,you must select the button in question. |
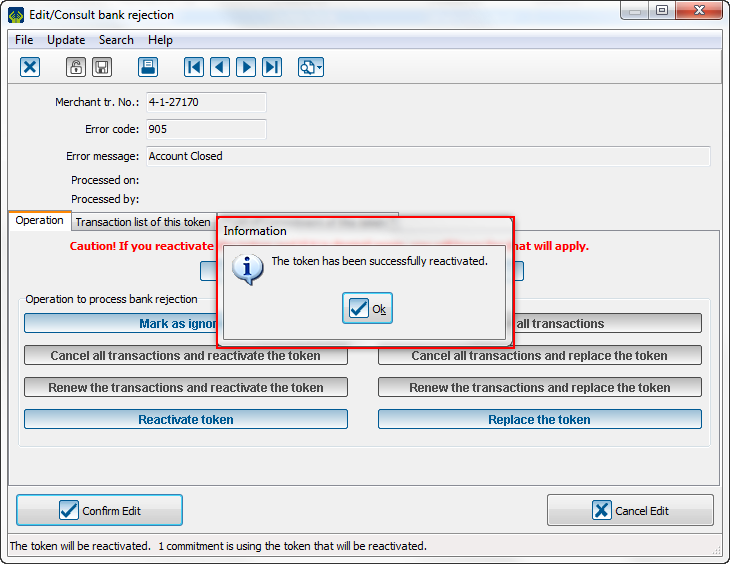
| Then, this message will pop-up to confirm the token reactivation: | |
| |
| Click on "Ok" to continue. |
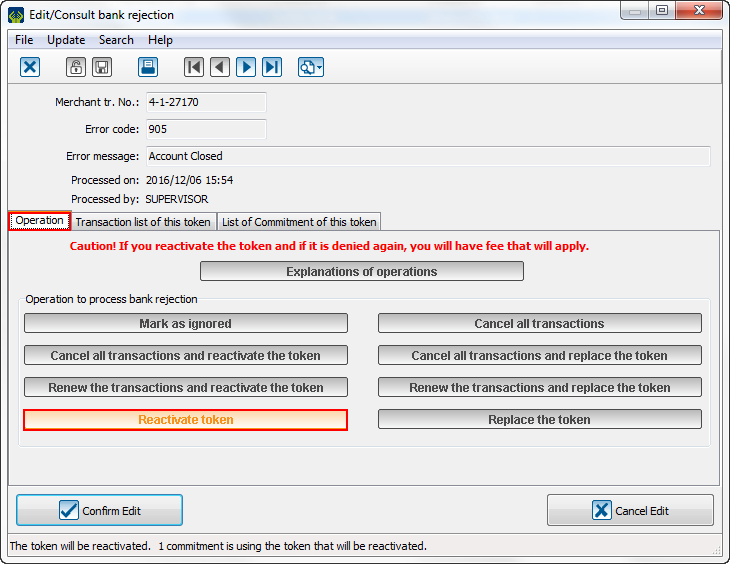
| Once all step finished, this window will open: | |
| |
| Caution: See that the selected function is highlighted and all other functions are locked.
|
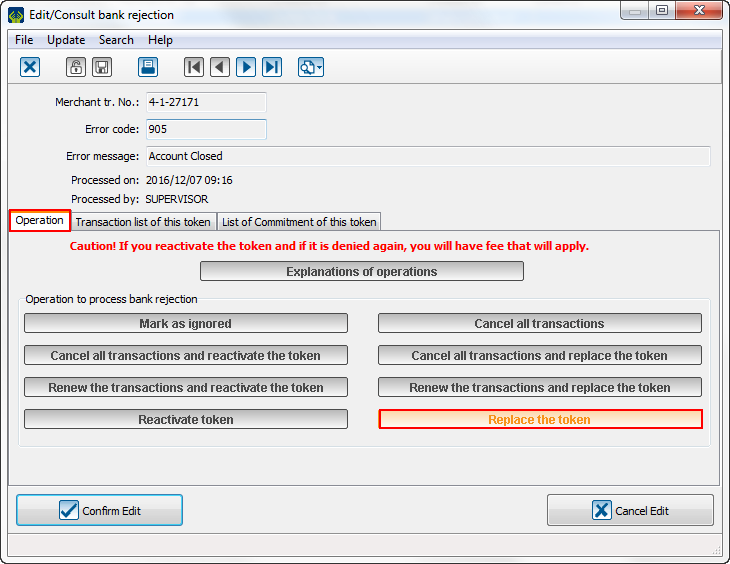
Replace the token
The "Replace the token" button is available as soon as there is a commitment and no transaction. For example, the transaction has been rejected, the client, which is having a commitment with your organization, contact you to cancel the transaction and he gives you new bank information for the next transactions of the commitment. This function will replace the token to change the bank information of this commitment.
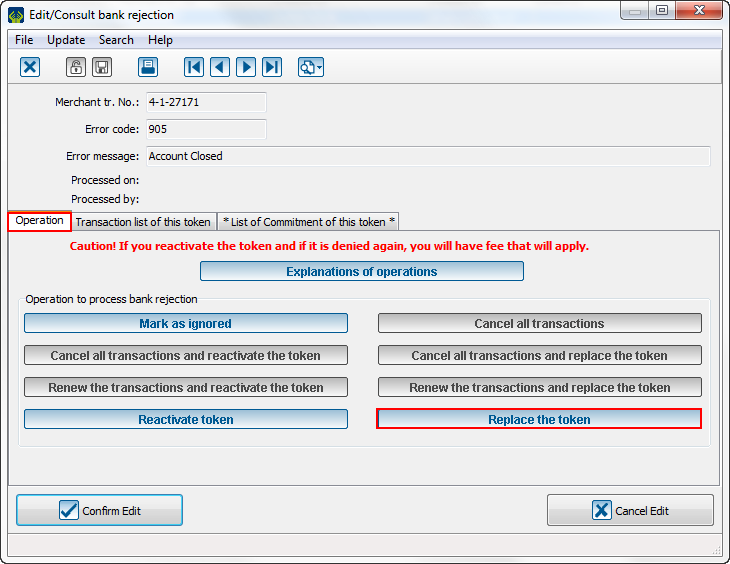
| When the reject window opens, you will have these options: | |
| |
| To replace the token, you must select the button in question. |
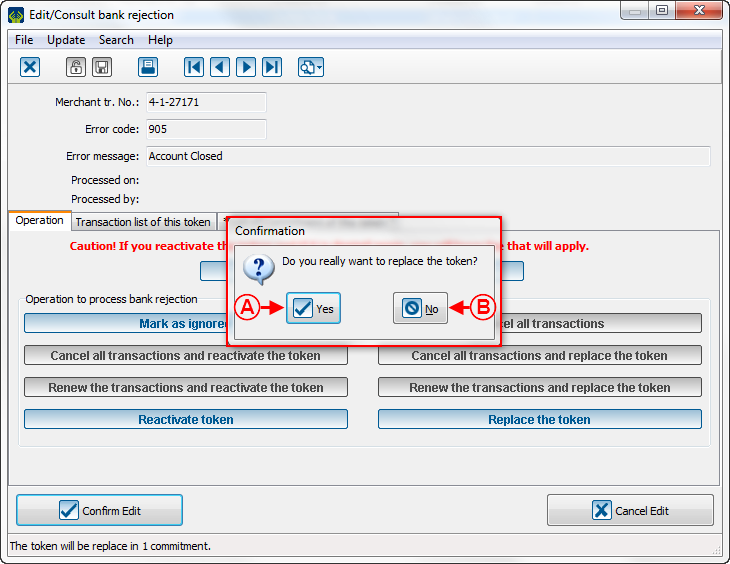
| Then, this window pop-up: | |
| |
|
A: If you click on "Yes", you will continue to the next step. |
B: If you click on "No", you will go back. |
| Then, this page opens to allow you to create a new token which will replace the old one: | |

| |
| You must enter the bank information of the client to continue. |
| The validation page is displayed if the information entered before are valid: | |

|
| Once all step finished, this window will open: | |
| |
| Caution: See that the selected function is highlighted and all other functions are locked. |
Mark as ignored
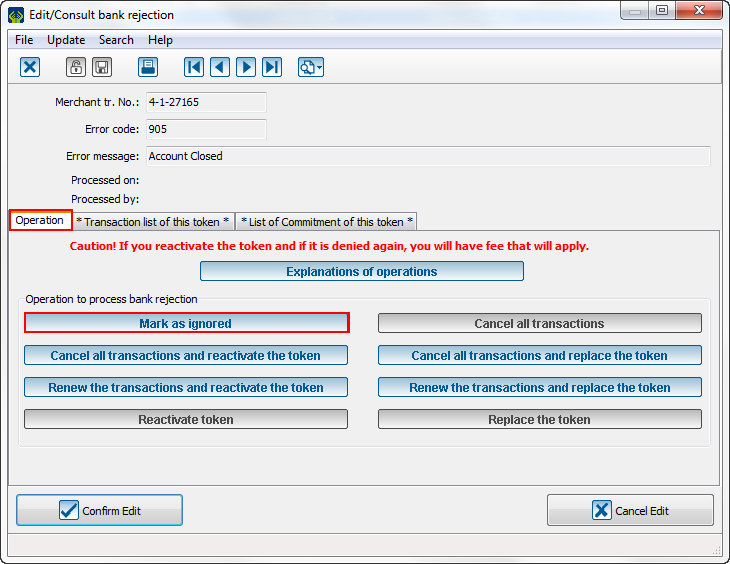
The "Mark as ignored" button is always available. This function will ignore the reject while not touching the token. Without modification, the token cannot be used anymore.
| When the reject window opens, you will have these options: | |
| |
| To ignore the reject, you must select the button in question. |
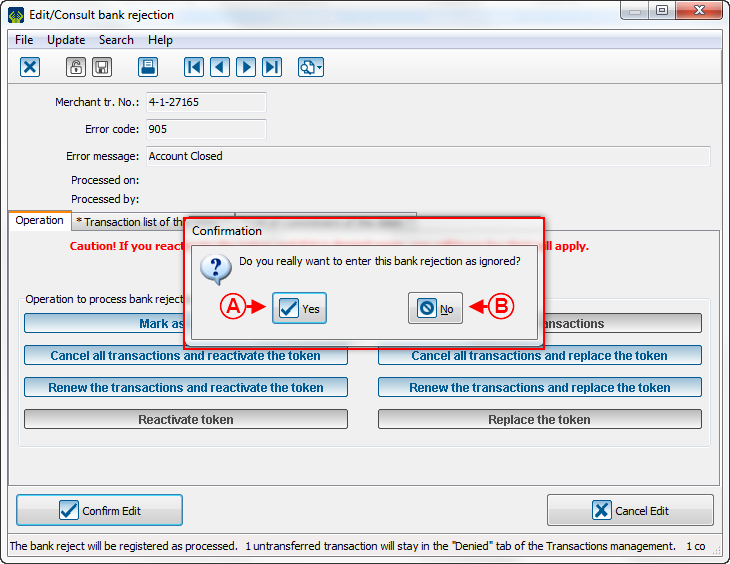
| Then, this window will pop-up: | |
| |
|
A: If you click on "Yes", you will ignore the reject. Caution: After this step, you will not be able to go back anymore. |
B: If you click on "No", you will go back. |
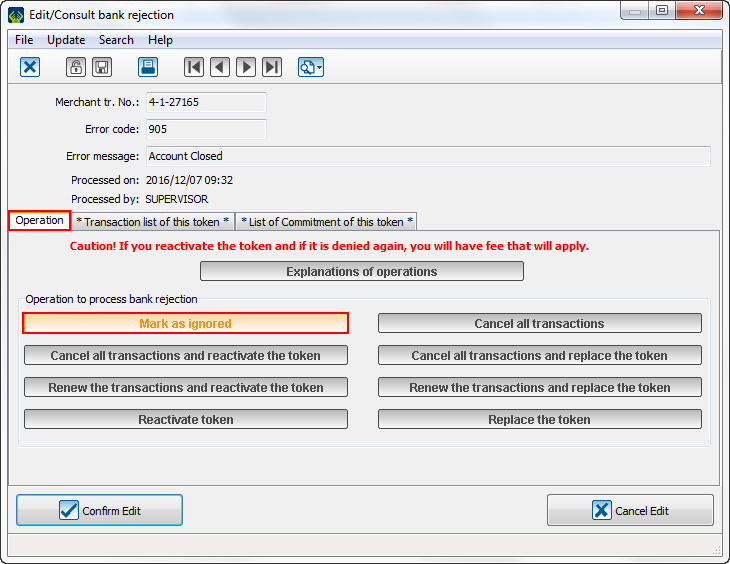
| Once this step finished, this window opens: | |
| |
| Caution: See that the selected function is highlighted and all other functions are locked. |
Error code grid
| To help you to understand the errors, this is a grid of all possible errors for EFT (Electronic Funds Transfer). | |
|
|
Edit Reject |
|
|
NSF (Debit Only) |
|
|
Account not found |
|
|
Payment Stopped/Recalled |
|
|
Account Closed |
|
|
No Debit Allowed |
|
|
Funds Not Cleared (Debit Only) |
|
|
Currency/Account Mismatch |
|
|
Payor/Payee Deceased |
|
|
Account Frozen |
|
|
Invalid/Incorrect Account No. |
|
|
Incorrect Payor/Payee Name |
|
|
No Agreement Existed |
|
|
Not According to Agreement – Personal |
|
|
Agreement Revoked – Personal |
|
|
No Confirmation/Pre-Notification – Personal |
|
|
Not According to Agreement - Business |
|
|
Agreement Revoked – Business |
|
|
No Confirmation/Pre-Notification – Business |
|
|
Customer Initiated Return |
|
|
Institution in Default |
Document name: ProDon:Bank Rejections
Version : 5.0.3
