Difference between revisions of "ProDon:Searching and Eliminating Duplicates"
| Line 1: | Line 1: | ||
{{Header_TOC}}<br> | {{Header_TOC}}<br> | ||
| + | |||
| + | '''<u>CAUTION</u>''' : This document is for '''VERSION''' '''5''' of '''''Prodon'''''. To go to the document for version 4, [[ProDon:Searching_and_Eliminating_Duplicates (Version 4)|click here]]. | ||
| + | |||
| + | <br><span style="color: rgb(255, 0, 0);">'''WARNING : This document is currently being edited/revised, it is possible that some parts are missing or obsolete.'''</span> | ||
== Introduction == | == Introduction == | ||
Latest revision as of 11:32, 17 May 2019
| Searching and Eliminating Duplicates |
CAUTION : This document is for VERSION 5 of Prodon. To go to the document for version 4, click here.
WARNING : This document is currently being edited/revised, it is possible that some parts are missing or obsolete.
Introduction
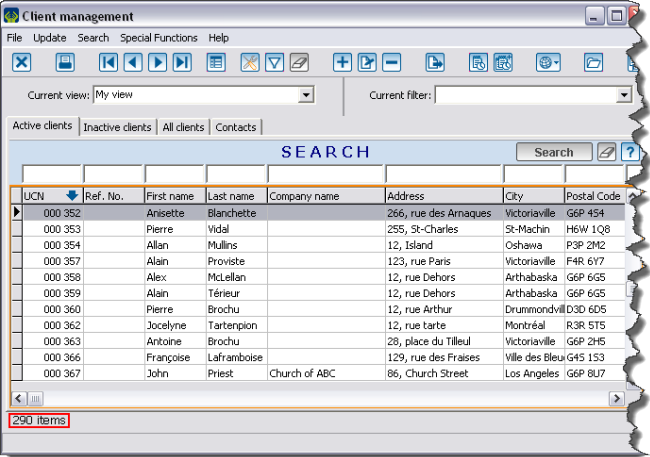
This procedure allows you to find clients duplicates in an active list. A duplicate occurs when there are more than one file for the same client.
|
|
The active list is the list that is displayed onscreen in the "Client management", the "Task management" or in "Analysis & History". |
|
|
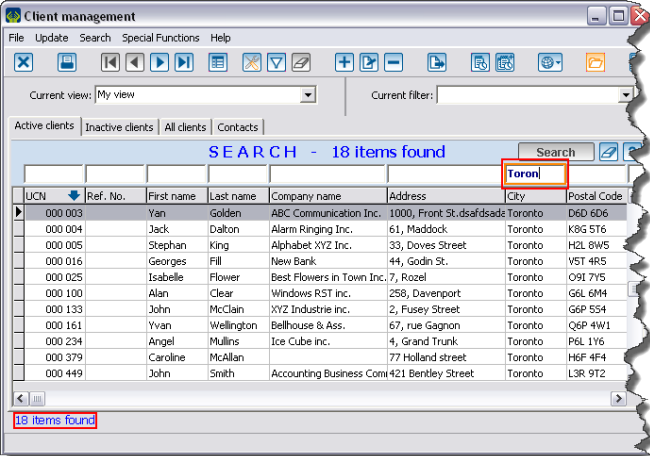
If a filter or a search is made, the number of items onscreen decreases, but it still is the active list. |
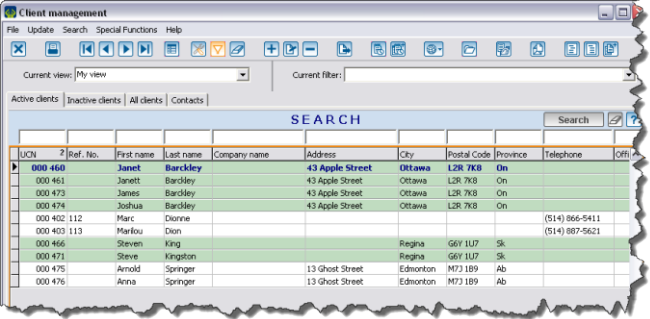
To conduct a duplicates search, you must always go through the Client management.
Searching Duplicates
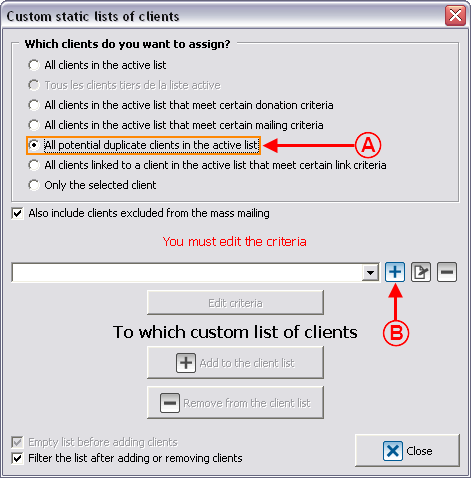
To obtain a duplicates list, you need to use the "Customized lists" tool. To do so, click on the "![]() " icon in the Client management and select the "Static list" option.
" icon in the Client management and select the "Static list" option.
| |
|
A: Select the option "All potential duplicate clients in the active list". |
B: Click on the |
| |
|
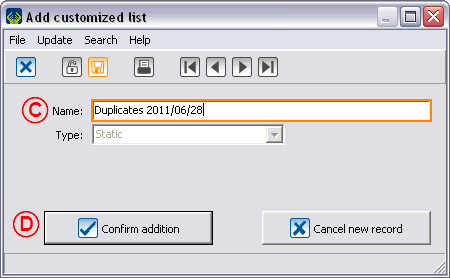
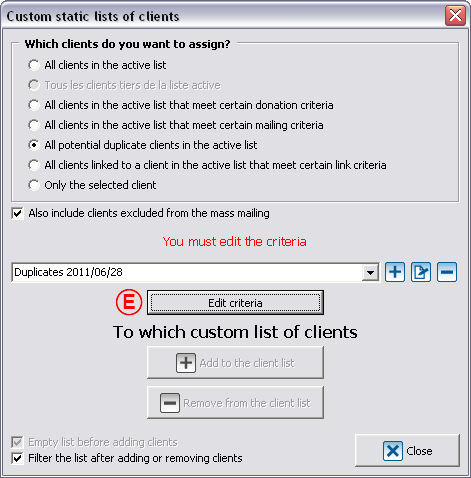
C: In this window, name the list distinctly. |
D: To create a customized list, click on " |
|
|
E: Click on "Edit criteria". |
 | |
|
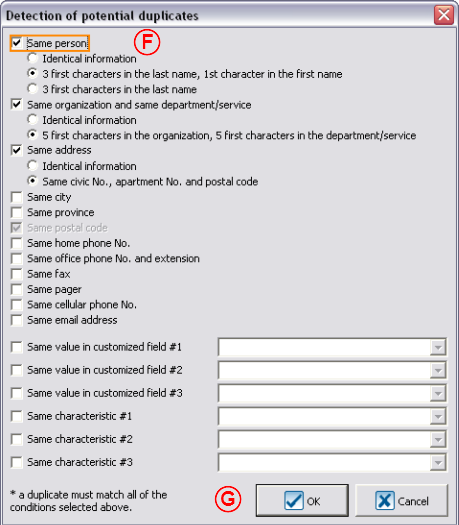
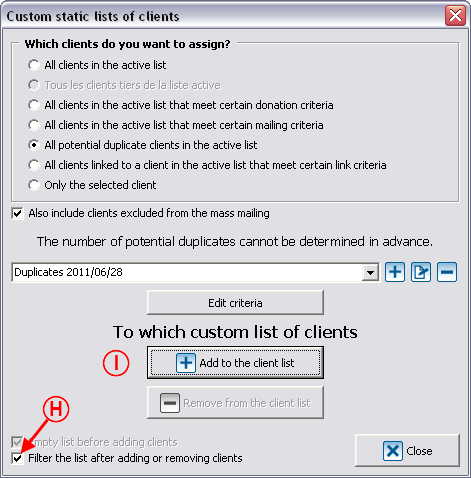
H: This box is usually checked by default and allows you to automatically filter the duplicates list after the addition. |
|
 | |
|
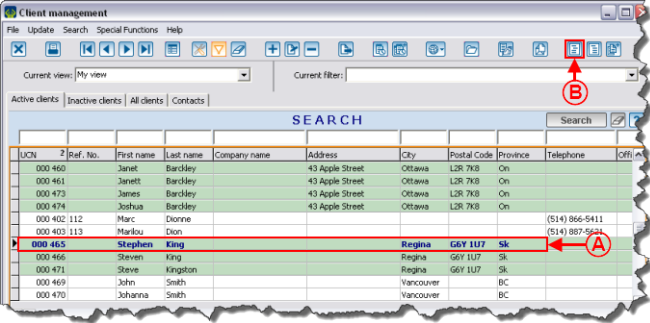
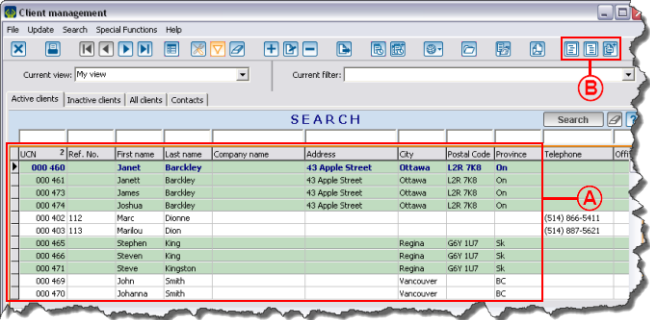
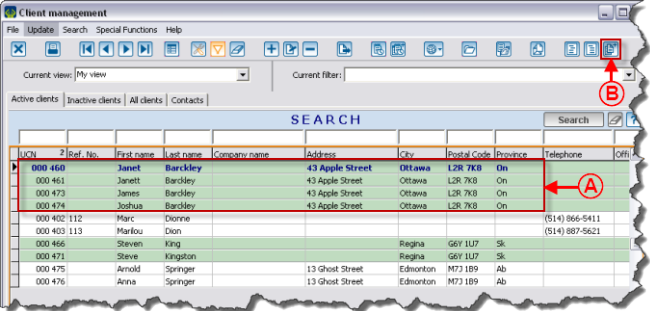
A: The clients who are potential duplicates are grouped. Alternating colours allow you to differentiate them quickly and easily. |
B: Note that three icons will be added at the upper right side of the grid. |
|
NOTE: If the box of the previous step H was not checked, you would have to do a filter to obtain the result onscreen. See the "Filter Data (Queries)" document for more details about filters. | |
Remove a Client from the List of Duplicates
 | |
|
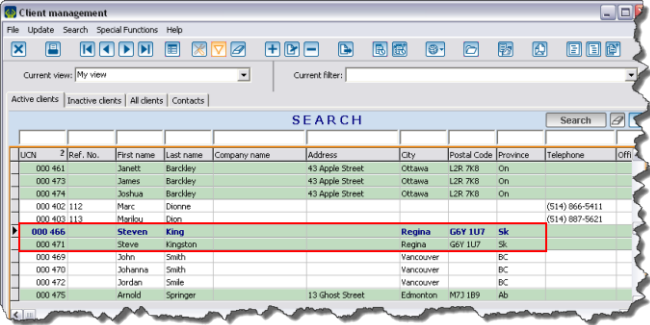
There are only two clients left in the group of duplicates out of the initial three. |
Remove a Group of Duplicates from the List
 | |
|
The group disappears and the alternating colours adjust accordingly in order to better differentiate the groups of duplicates. |
Merge a Group of Duplicates
|
The button " | |
 | |
|
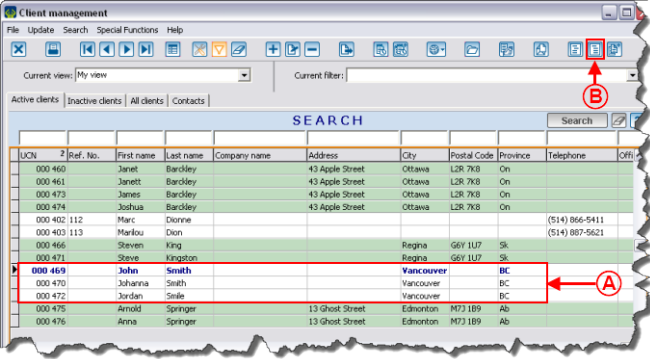
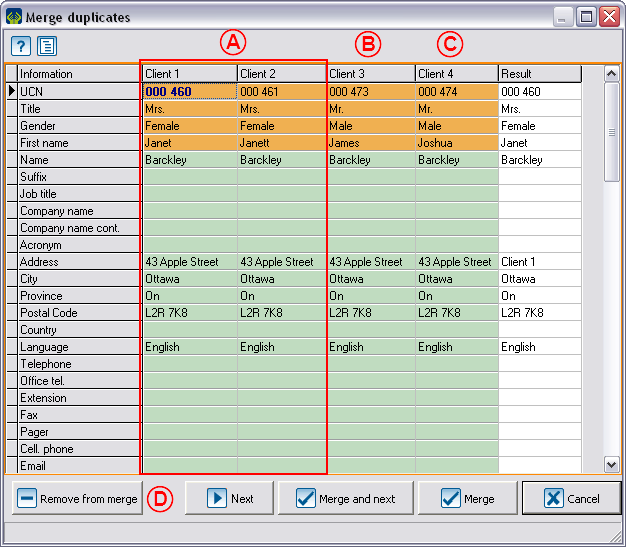
A: Select a client in the group of duplicates to merge. |
|
|
This window opens. | |
 | |
|
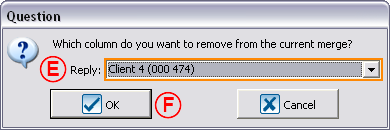
E: Using the drop-down list, select the client to be removed from the list of duplicates to merge. |
|
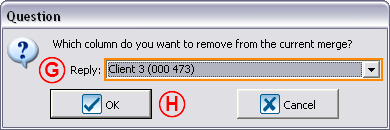
After clicking on "![]() OK" the "Question" window will close automatically. From the merge duplicates window, click again on "
OK" the "Question" window will close automatically. From the merge duplicates window, click again on "![]() Remove from merge", to be able to remove the other clients who are not duplicates.
Remove from merge", to be able to remove the other clients who are not duplicates.
| |
|
G: Using the drop-down list, select the client to be removed from the list of duplicates to merge. |
|
|
|
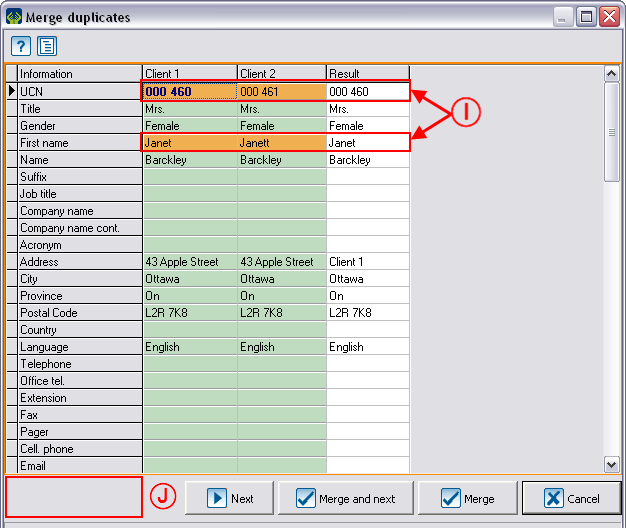
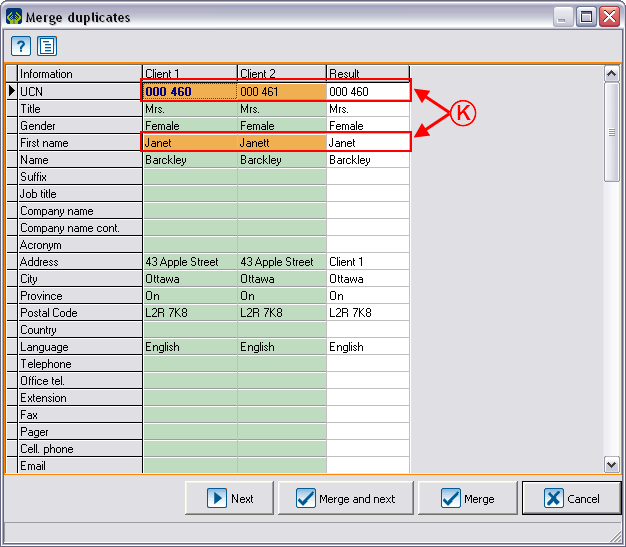
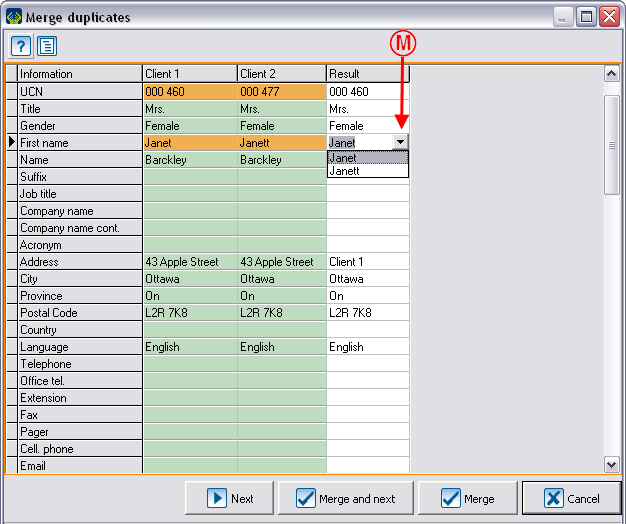
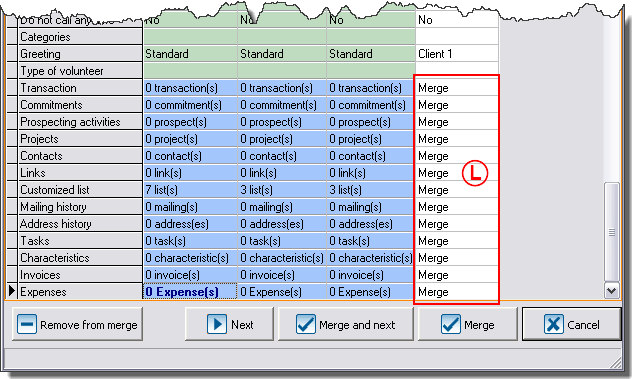
L: The only fields that remain untouched by this function are the fields highlighted in blue at the bottom of the merge grid. For these fields, the merge is compulsory and there is no other option. |
Details and Additional Exceptions
For the "Gender" field, it is always possible to select either "Male" or "Female". You can also delete the information to to leave the cell empty.
For the "Language" field, it is always possible to choose from all the languages available in ProDon.
For the fields corresponding to a check box, it is possible to select "Yes" or "No" only if the answers are available for one of the clients present in the merge interface. For example, if all the clients have "No" at the "No receipt wanted" field, it will be impossible to select "Yes".
For the fields: "Sector, Canvasser, Designated gift, of date type, customized fields of predefined or numerical list type", you must choose from the available choices in accordance with the clients present in the merge interface. For example, if none of the clients has a sector of activity, it will be impossible to choose one.
For the "Categories" field, you must select the information corresponding to a particular client or merge the information of all the clients.
Many verifications are done when merging, some will require your intervention and others will apply automatically. For instance, it is impossible to merge a client for whom you have selected "No" at the "Deceased" field and for whom you would have entered a date of death.
|
|
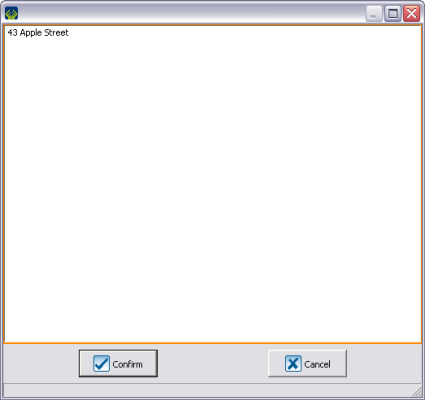
It is possible to double-click in the "Adress", "Comment" and "Message" fields in order to see the complete information even if it contains several lines. |
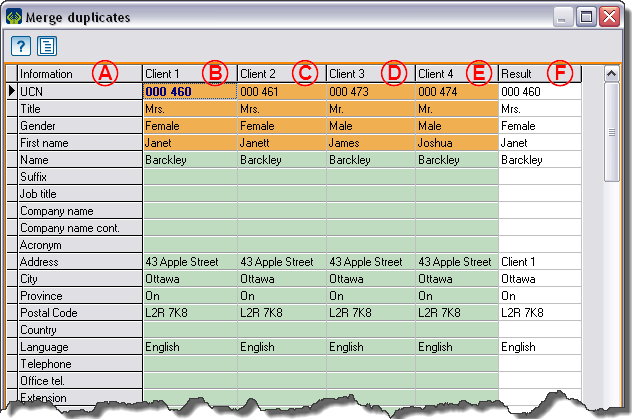
The green lines contain an identical piece of information for each client.
The orange lines contain different information for at least two clients.
The blue lines contain information that will inevitably be merged.
Document name: ProDon:Searching and Eliminating Duplicates
Version : 4.6.5.5
