Difference between revisions of "ProDon:Electronic Transaction Module - PaySafe"
Jguillemette (talk | contribs) |
Jguillemette (talk | contribs) |
||
| Line 2: | Line 2: | ||
| − | |||
<br> | <br> | ||
'''CAUTION:''' This is the '''version 5''' of the document, to go to the '''version 4''', [[ProDon:Electronic_Transaction_Module_-_PaySafe (Version 4)|click here]] | '''CAUTION:''' This is the '''version 5''' of the document, to go to the '''version 4''', [[ProDon:Electronic_Transaction_Module_-_PaySafe (Version 4)|click here]] | ||
Revision as of 08:15, 17 March 2017
| Electronic Transaction Module - PaySafe |
CAUTION: This is the version 5 of the document, to go to the version 4, click here
Introduction
The "Electronic Transaction" module allows to save, cumulate and process transactions paid with credit cards or bank transfers.
Electronic payments can be validated in 2 ways, on every transaction (instant) or in batches (at the desired time).
If the electronic payments are validated in batches, the transactions will be kept in ProDon, until the moment the batch is sent to PaySafe, which will perform verifications on it the night following the transfer.
The electronic payment entry is always done in PaySafe's interface and all the information is stored is a secured vault at PaySafe. No credit card or CVV number (see Lexicon for definition) will be kept in ProDon.
After entering the payment information in the PaySafe interface, a token is returned to ProDon. This token is a unique reference number that is assigned to the credit card information and this token can be kept in ProDon, in order to reuse the payment information in future transactions.
Adding/Editing/Viewing Electronic Transactions
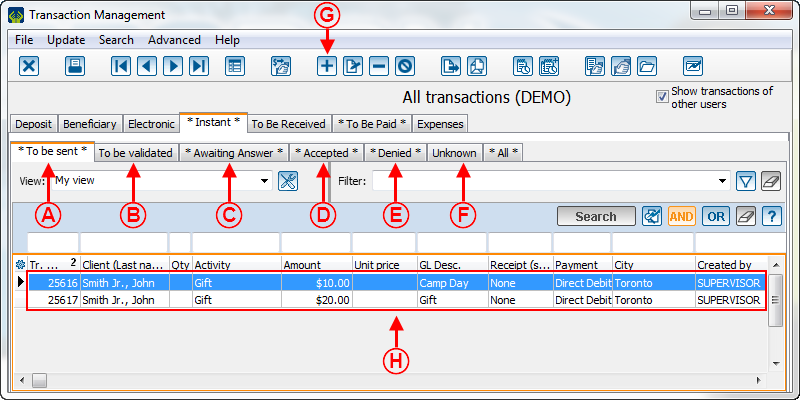
To view the electronic transactions in treatment, go to the "Instant" tab of the "Transaction management".
 | |
|
A: The "To send" tab contains all the transactions to be sent to PaySafe. To learn how to process the transactions of this tab, view this section. |
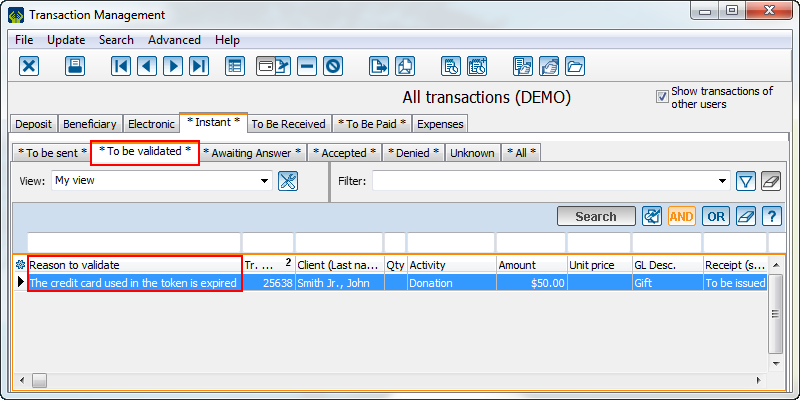
B: The "To be validated" tab contains transactions that have expired information.To learn how to process the transactions of this tab, view this section. |
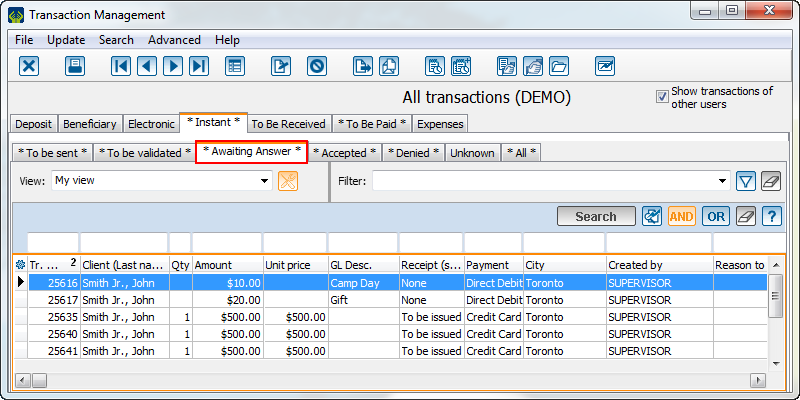
| C: The "Awaiting response" tab contains all the transactions that have been sent to PaySafe batch processing. To learn how to process the transactions of this tab, view this section. |
D: The "Accepted" tab contains all the transactions that were processed by PaySafe and which were accepted, you must then transfer them. To learn how to process the transactions of this tab, view this section. |
|
E: The "Denied" tab contains all the transactions that were processed by PaySafe which were declined. To learn how to process the transactions of this tab, view this section.
|
F: The "Unknown" tab contains all the transactions for which there was a problem during the treatment. If a transaction is found under this tab, contact the technical support at Logilys. |
|
G: Click on the
|
H: To view or modify a transaction, double-click on the right transaction. After double-clicking on the transaction, this window opens.
|
Entering Electronic Transactions
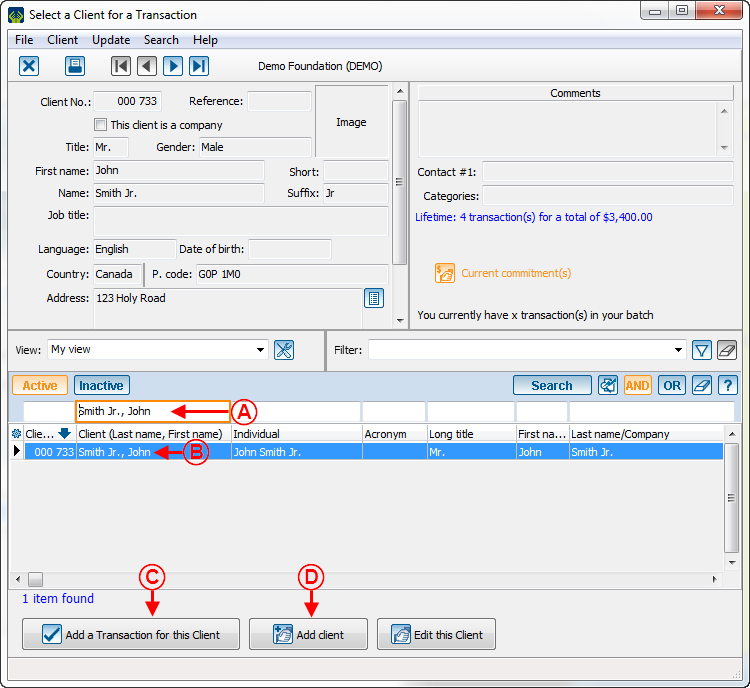 | |
|
A: Search the client for whom an electronic transaction must be added. |
B: Select the desired client. If the client does not exist in ProDon, see point D. |
|
C: After selecting the desired client at B, click on the " |
D: If the client does not exist in the database, click on the " |
|
After double-clicking on transaction to modify or after adding a new transaction, the following window opens. NOTE: To learn how to fill in the fields of the transaction, see the "Adding a Transaction" of the "Transaction Logging" document. | |
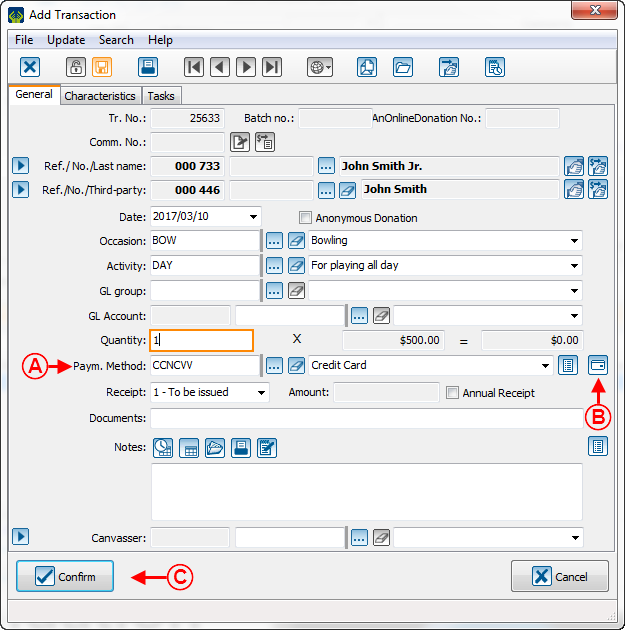 | |
|
A: Select a PaySafe instant payment method. After selecting a PaySafe instant payment method, a window asking to save is displayed. After clicking on "Yes" to save, this window opens. NOTE: When a donation is paid with a credit card from another country, it is required to specify the CVV. However, the CVV payment method is not available here, but it will be possible to specify it in the PaySafe payment zone. |
B: By adding a transaction, the When modifying a transaction, the |
|
C: After entering all the transaction information, click on the " | |
Choosing the Electronic Payment Method
|
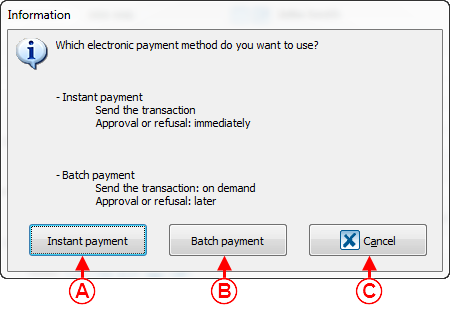
After selecting a PaySafe instant payment method or clicking on the | ||
 | ||
|
A: By selecting the "Instant payment" option, the transaction is verified immediately and can be found under the "Accepted" or "Denied" tab of the "Transaction management". CAUTION: In the case of a bank transfer, it is possible that the transaction is accepted, because all the banking information is valid. However, it can be declined a few days later on NetBanx, because of insufficient funds. |
B: By selecting the "Batch payment" option, the transaction can be found under the "To send" tab of the "Transaction management", in order to process it later in a batch. | |
|
C: By clicking on the " |
| |
Choosing the Registered Token
It is possible the following window opens after clicking on the "Instant payment" or "Batch payment" button. If it is indeed the case, follow these instructions.
If the window displayed, after clicking on the "Instant payment" or "Batch payment" button, is not the following, view this section.
|
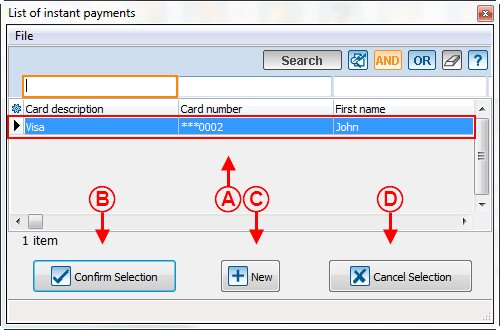
If a token had already been registered in the client file when entering a prior transaction, the following window opens after clicking on the | |
 | |
|
A: Select the right token in the list. |
B: After selecting the right token, click on the " |
|
C: If the tokens at A do not correspond to the payment method to be used, click on the " |
D: The " |
Entering Payment Information
If a token had already been created in a prior transaction, view this section.
|
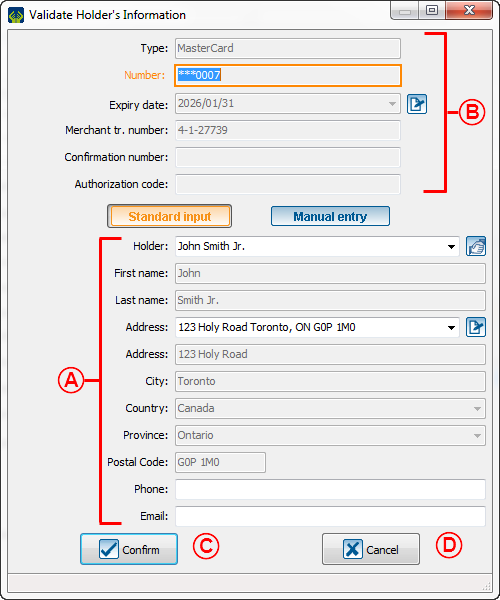
After clicking on the "Instant payment" or "Batch payment" button of this window, the following window opens. The information of the client making the transaction should appear automatically. | |
 | |
|
A: This information must be entered, except for the phone number and the email address. |
B: This statement only appears if the "Batch payment" option has been chosen in the previous window. In that event, the amount of the transaction will not be withdrawn right away and only a few pieces of information will be validated. To learn more about payments in log, click here. |
|
C: After entering all the information at A, click on the " |
D: By clicking on the " |
|
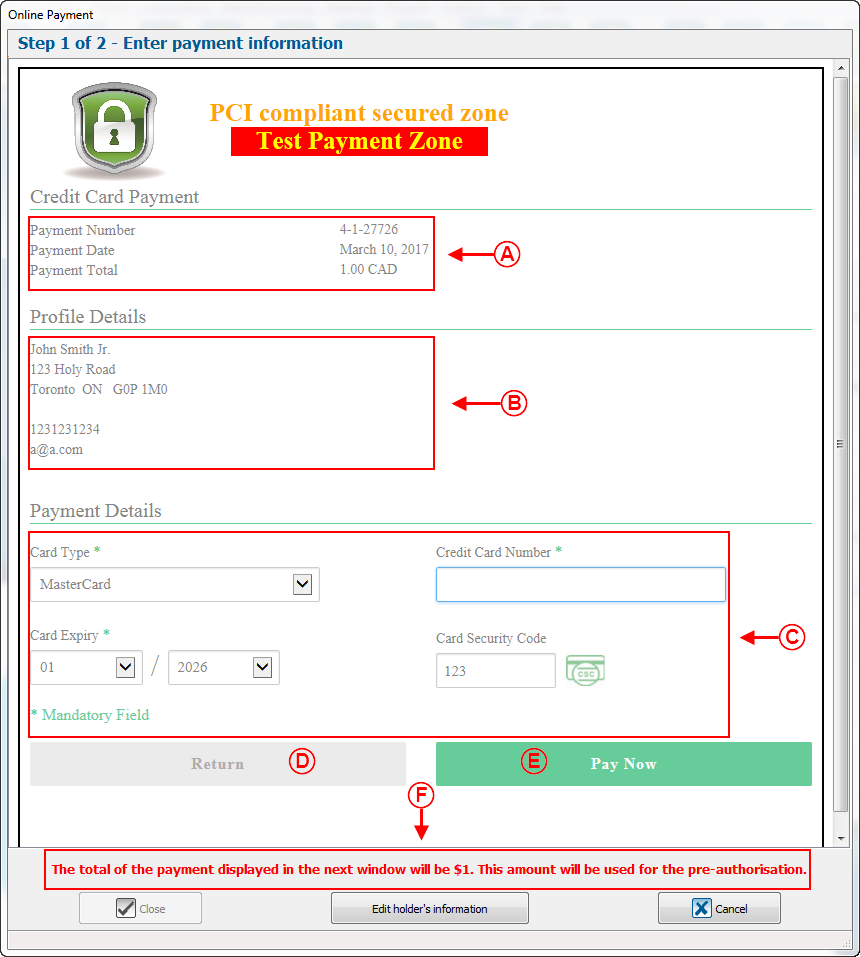
After clicking on the " | |
 | |
|
A: Verify the information of the transaction. |
B: Verify the information of the client. |
|
C: Enter the payment information. |
D: By clicking on the "Return" button, this window opens and the operation is cancelled. |
| E: By clicking on the "Pay now" button, the transaction is verified. If the transaction is accepted, this window opens. If the transaction is declined, this window opens. |
F: If the entered transaction is in batches, the amount at A will be $1. This amount is actually an authentification that allows for the validation of the card. This amount is not debited, it is only borrowed for more or less 24 hours. |
Confirming the Transaction Processing
Following the transaction entry, the transaction can be accepted or denied. Here are the instructions to follow in both cases.
Transaction Accepted
|
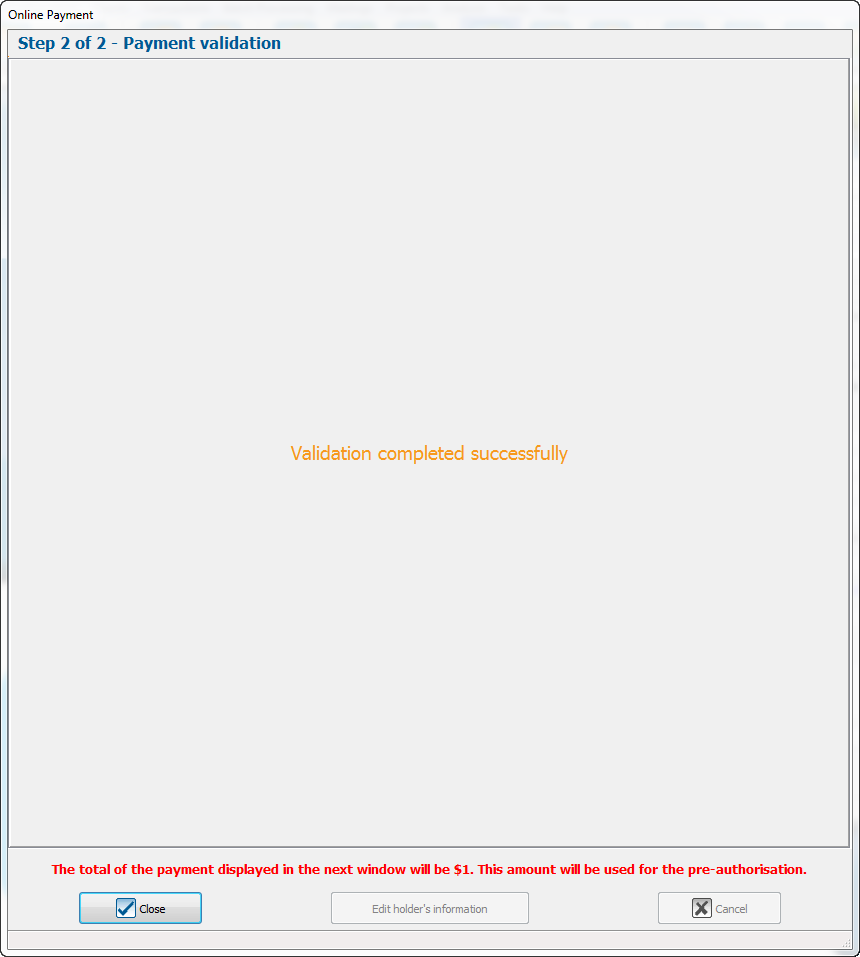
If the transaction is accepted, the following window opens. | |
 | |
|
Click on the " |
|
After clicking on the " | |
 | |
|
This window allows you to decide whether or not the token of the payment information should be kept in ProDon for future use. By clicking on the " By clicking on the " To learn how to view the payment information in a transaction file, see this section. NOTE: It is recommended to keep a token only for commitments or if the donor is a regular one. Since the probability is that if a donor does not make donations frequently; therefore, his or her credit card will be expired or invalid for future transactions. |
Transaction Denied
|
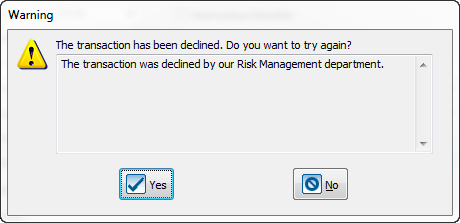
If the transaction is declined, a window similar to the following one opens. | |
 | |
|
The " The " NOTE: It is advisable to choose the " |
Cancelling a Transaction
|
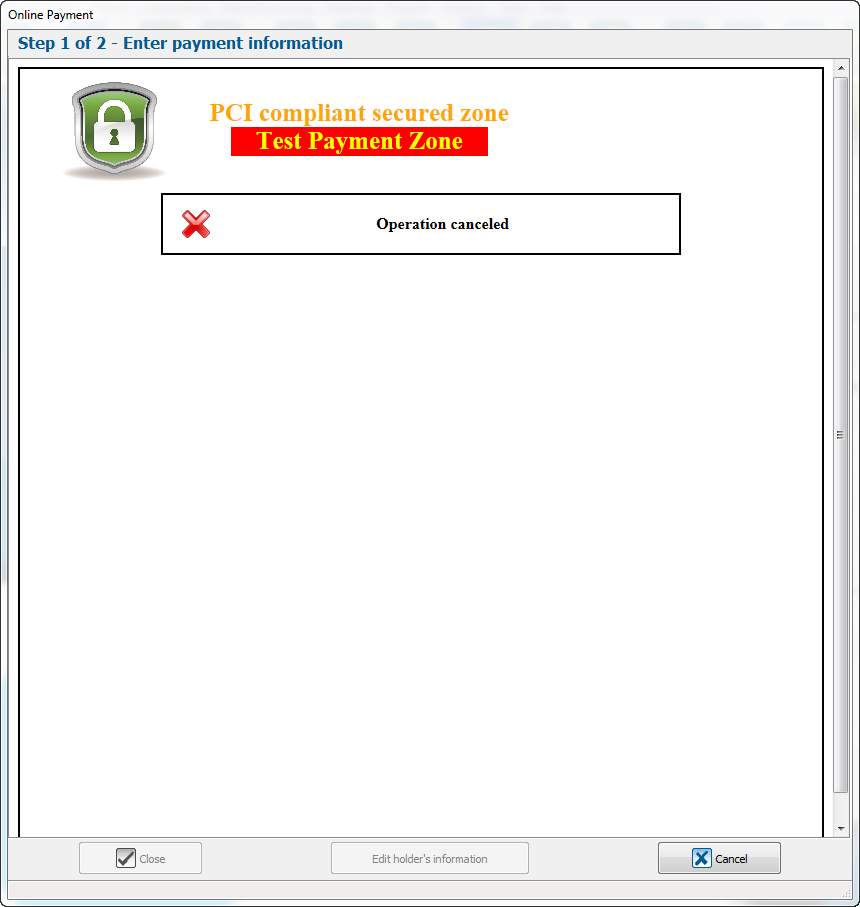
After clicking on the "Return" button of this window, the following window opens. | |
 | |
|
Click on the " |
Processing of Instant Transactions
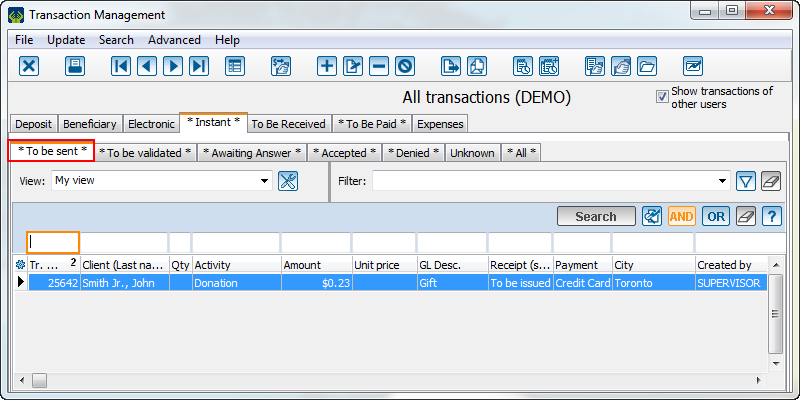
"To be sent" Tab
If the payment method chosen in this window was "Batch payment", the transaction would be found under the "To be sent" tab.
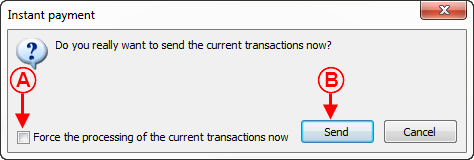
This tab contains all the transactions to be sent to PaySafe. You need to send the transactions to PaySafe, which will verify them the night following the transfer.
 | |
|
Click on the "Send" button at B, to send the transactions to PaySafe. If the checkbox at A is not checked, the transactions will be found in the "Awaiting response" tab, so that they can be processed later. If the checkbox at A is checked, the transactions are verified immediately and can be found under the "Accepted" or "Denied". NOTE: The checkbox at A is only available for users who have the access to force the immediate treatment. It is not recommended to check this checkbox, because if there are a lot of transactions to process, this operation can take a few minutes. It is therefore advisable to send them under the "Awaiting response" tab, so that PaySafe processes them in batches, the night following the transfer. |
"To be validated" Tab
"Awaiting Response" Tab
The "Awaiting response" tab contains all the transactions that have a date prior to the current date and all the transactions that were sent to PaySafe to be processed in batches.
PaySafe usually processes those transactions at 3:00pm and 11:30pm every day.
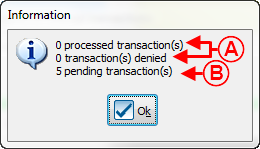
In order to know the status of the transaction (accepted or denied), you must validate the status of the transactions.
 | |
|
A: The accepted or denied transactions have been verified by PaySafe. They can then be found under the "Accepted" or "Denied" tab. | |
|
B: The pending transactions have been verified by PaySafe. They can be found under the "Awaiting response" tab. NOTE: The transactions remain pending if they have been sent on the same day or if the date of the transaction is later than the current date. |
"Accepted" Tab
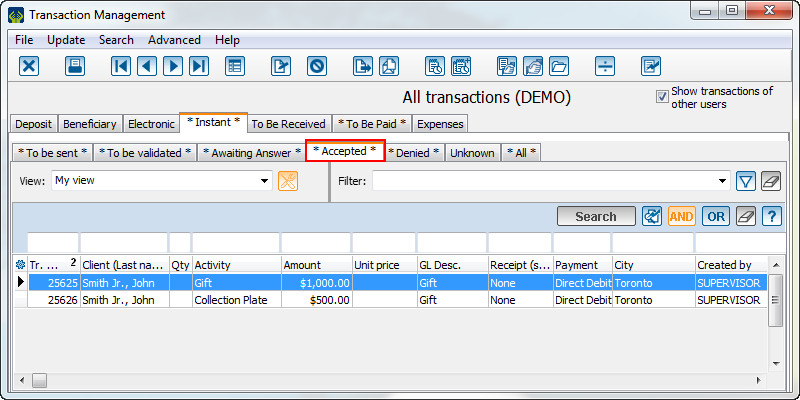
The "Accepted" tab contains all the transactions verified by PaySafe and that were accepted.
As any other transaction in ProDon (cheque, cash, in-kind gift, etc.), these transactions must be transferred.
 | |
|
To perform a transaction transfer, click on the |
"Denied" Tab
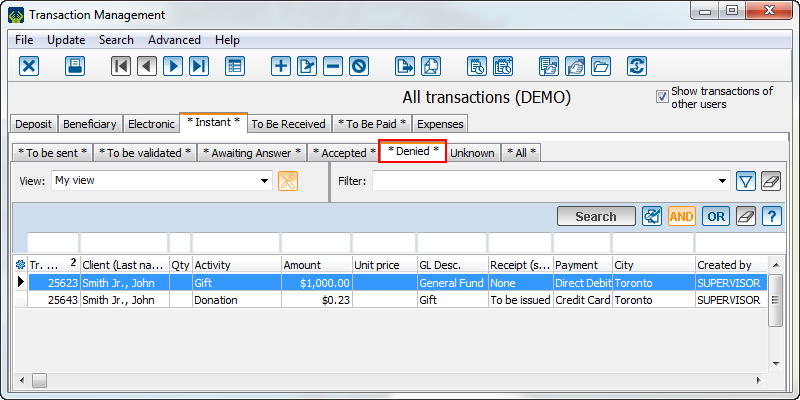
The "Denied" tab contains all the transactions verified by PaySafe and which were declined.
Each denied transaction contains an error code. To view this error code, display the "English message (InstantPay.)" in the view.
In certain situations, you will have to contact the donor so that he or she sees with his or her issuing bank why the transaction did not go through and in other situations, the organization might have to contact PaySafe.
 | |
|
To open a denied transaction to be processed, double-click on the right transaction. See the "Processing the denied transactions" section to learn how to process denied transactions. |
Processing the denied transactions
CAUTION: There is a difference between denied transactions and bank rejects. Bank rejects are only available from the version 5.0.3. To know how to process bank rejections, click here.
There are 2 ways to process a denied transaction:
In the case, for instance, of an error in the entry of a credit card number or of the donor's information, it is required to empty the payment information and to enter it again (after revalidating the payment information with the donor). To learn how to process this type of denied transactions, click here.
In other cases, (e.g. insufficient funds or refusal from the issuing bank), you simply need to send the instant payment again, after making sure with the donor, that he or she indeed wants the transaction to go through again. To learn how to process this type of denied transactions, click here.
Emptying the Payment Information and Entering it Again
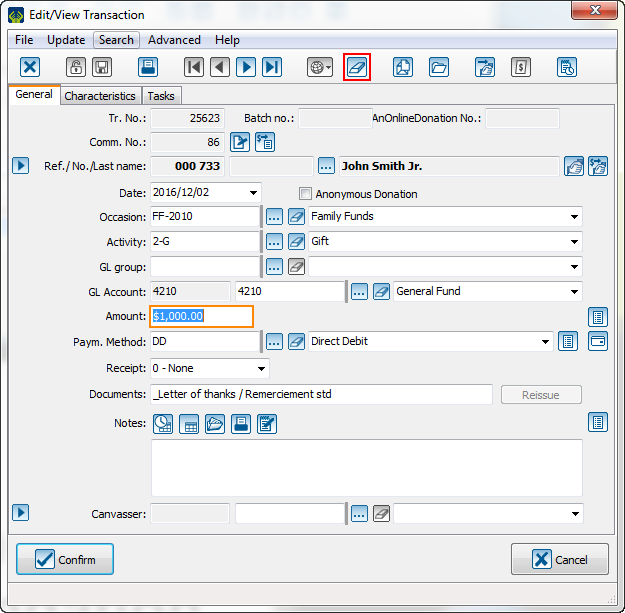
If the denied transaction requires to empty the payment information and to enter it again, follow these instructions.
Otherwise, click here.
|
After double-clicking on the denied transaction, the following window opens. | |
 | |
|
To enter the right payment information, click on the |
Sending the Instant Payment Again
If the denied transaction only requires to send the payment information again, follow these instructions.
Otherwise, click here.
The payment information can be sent again from 2 locations:
Referral of the Payment Information from the "Denied" Tab of the Transaction Management
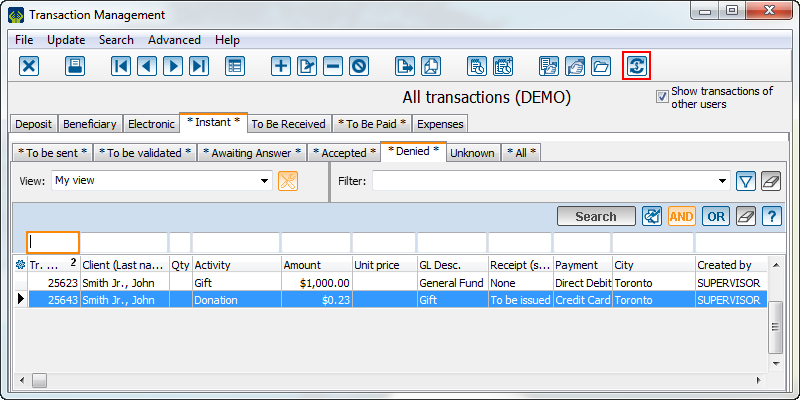
From the "Denied" tab of the transaction management, it is possible to send all the payments at the same time or one at a time.
 | |
|
To revalidate one or more instant payment(s), filter the payment(s) to be sent and click on the |
 | |
|
Decide whether only the selected transaction should be returned or all the transactions from the list. After selecting the right option, click on " |
|
After clicking on the " | |
 | |
|
Click on the "Send" button at B, to send the transactions to PaySafe. If the checkbox at A is not checked, the transactions can be found under the "Awaiting response" tab, so they can be processed later. If the checkbox at A is checked, the transactions are verified immediately and can be found under either the "Accepted" or the "Denied" tab. NOTE: The checkbox at A is only available for users who have access to force the immediate treatment. It is not recommended to check this checkbox, because if there are many transactions to process, this operation can take a few minutes. It is therefore advisable to send them under the "Awaiting response" tab, so that PaySafe can process them in batches, the night following the transfer. |
Referral of the Payment Information from the Transaction Edit File
|
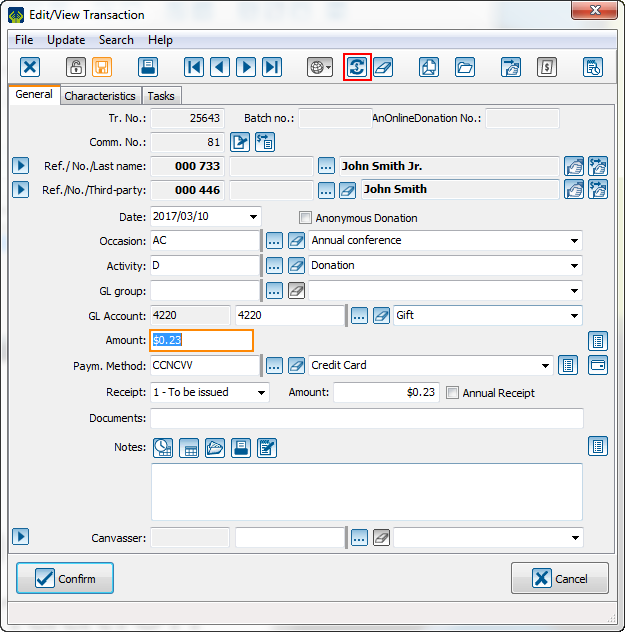
After double-clicking on the denied transaction, the following window opens. | |
 | |
|
To revalidate the payment information, click on the |
Viewing the Tokens
The entry of the electronic payment information is always done in the PaySafe interface and all this information is stored in a secured vault at PaySafe. No credit card or CVV number (see the lexicon for definition) is kept in ProDon. After entering the payment information in the PaySafe interface, a token is returned to ProDon. This token is a unique reference number assigned to the credit card number and this token can be kept in ProDon, in order to reuse the payment information for future transactions.
It is possible to view those tokens from 2 locations in ProDon:
In the Transaction File
|
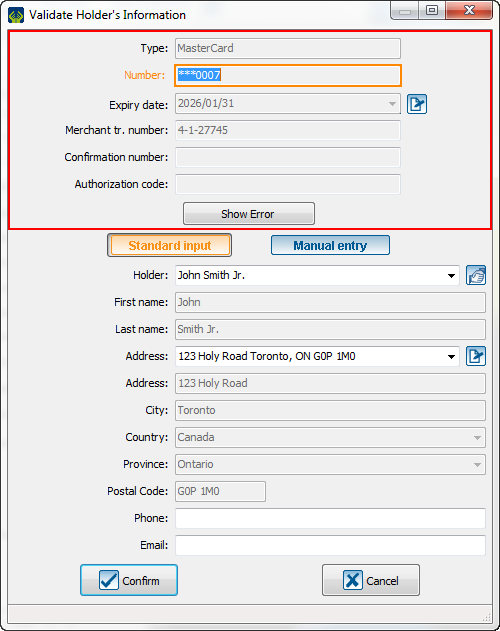
The token of the transaction file can be viewed by clicking on the | |
 |
In the Client File
|
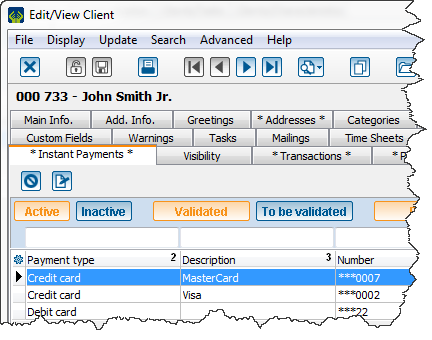
The tokens of the client file can be viewed under the "Instant payments" tab. | |
 | |
|
NOTE: In order for the tokens to be kept in the client file, you should answer "Yes" to this question. |
Document name: ProDon:Electronic Transaction Module - PaySafe
Version : 5.0.3.2
