Difference between revisions of "ProDon:User Management"
(Tag: Visual edit) |
(→Add a User) (Tag: Visual edit) |
||
| Line 17: | Line 17: | ||
{| width="200" cellspacing="1" cellpadding="1" border="1" class="wikitable" | {| width="200" cellspacing="1" cellpadding="1" border="1" class="wikitable" | ||
|- | |- | ||
| − | | colspan="2" | [[ | + | | colspan="2" |[[File:ProDon5 User Management 001.png|thumb|479x479px]]<br> |
|- | |- | ||
| width="50%" | | | width="50%" | | ||
Revision as of 10:54, 29 June 2016
| User Management |
Contents
[hide]
CAUTION : This document is for ProDon 5. To view the version 4 document, please click here.
Add a User
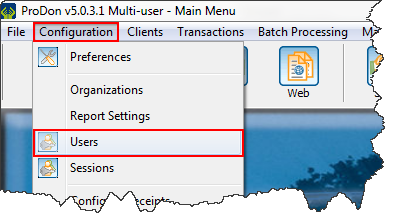
To add a user, click on the menu "Configuration" and select the option "Users".
Then click on ![]() to add and open the new user configuration.
to add and open the new user configuration.
|
A : Allow you to add, edit or delete a user. |
B : Export and merging button allow you to export or merge the elements of the list. |
|
C : User configuration allow you to choose the organization to which the user is associated. |
|
New User Configuration
| 673x673px | |
|
A :Username that will help for connection. |
B :Subscriber full name. |
|
C : Selection of the client to which the user is linked to. |
D : Allow you to specify if the user that will be created is a group. |
|
E : Allow you to deactivate a user (Ideally never delete a user, just deactivate for future reference). |
F : Allow you to select a group from which the user will have access. |
|
G : Password entry. |
H : Confirm password. |
|
I : Allow you to define user access. |
J : Display access, access description and section. |
| K : Allow you to search the access, to activate all the access or to deactivate all of them. | |
