Difference between revisions of "ProDon:Period Management"
| Line 13: | Line 13: | ||
<br> The period management window will open, it is now possible to: | <br> The period management window will open, it is now possible to: | ||
| − | {| cellspacing="1" cellpadding="1" border="1 | + | {| cellspacing="1" cellpadding="1" border="1" style="width: 524px; height: 449px;" class="wikitable" |
|- | |- | ||
| colspan="2" | [[Image:Period management 002.png]]<br> | | colspan="2" | [[Image:Period management 002.png]]<br> | ||
| Line 27: | Line 27: | ||
<br> By clicking on the [[Image:Button add plus.png]] button, the following window will appear: | <br> By clicking on the [[Image:Button add plus.png]] button, the following window will appear: | ||
| − | {| cellspacing="1" cellpadding="1" border="1" style="width: 407px; height: 531px; | + | {| cellspacing="1" cellpadding="1" border="1" class="wikitable" style="width: 407px; height: 531px;" |
|- | |- | ||
| colspan="2" | | | colspan="2" | | ||
| Line 85: | Line 85: | ||
=== In a Client File === | === In a Client File === | ||
| − | {| cellspacing="1" cellpadding="1" border="1" style="width: 533px; height: 339px; | + | {| cellspacing="1" cellpadding="1" border="1" class="wikitable" style="width: 533px; height: 339px;" |
|- | |- | ||
| colspan="2" | [[Image:Period management 006.png]] | | colspan="2" | [[Image:Period management 006.png]] | ||
| Line 106: | Line 106: | ||
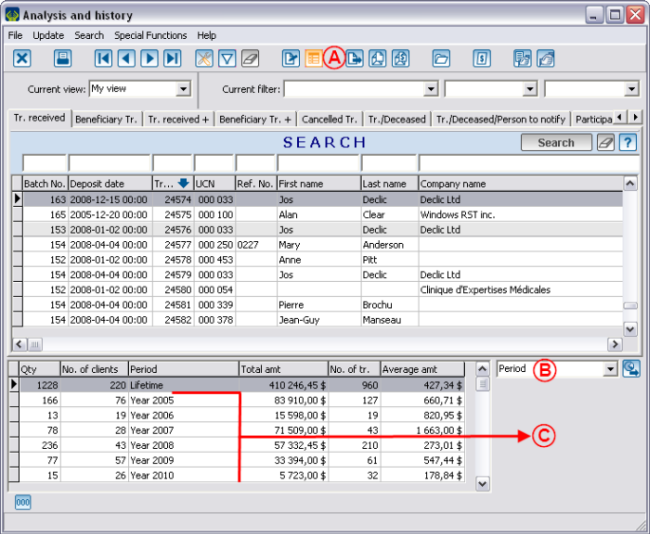
It is also possible to view a summary by period in "Analysis & History".<br> | It is also possible to view a summary by period in "Analysis & History".<br> | ||
| − | {| cellspacing="1" cellpadding="1" border="1 | + | {| cellspacing="1" cellpadding="1" border="1" style="width: 532px; height: 327px;" class="wikitable" |
|- | |- | ||
| colspan="2" | [[Image:Period management 007.png]]<br> | | colspan="2" | [[Image:Period management 007.png]]<br> | ||
| Line 143: | Line 143: | ||
<br> | <br> | ||
| − | {| cellspacing="1" cellpadding="1" border="1 | + | {| cellspacing="1" cellpadding="1" border="1" style="width: 392px; height: 519px;" class="wikitable" |
|- | |- | ||
| colspan="2" | [[Image:Period management 009.png]] | | colspan="2" | [[Image:Period management 009.png]] | ||
| Line 178: | Line 178: | ||
<br> | <br> | ||
| − | {{ | + | {{Footer_ProDon_Version|4.6.5.6}}<br> |
Revision as of 11:35, 23 February 2016
Contents
[hide]Introduction
Period management is a way to configure a period of time (e.g. the accounting period or a quarter of an organization). When the periods are configured, it is possible to see the summaries for each period in the "Client" files as well as in "Analysis & History". Moreover, these summaries can be used to produce reports and customized lists in relation to those specific periods.
Creating a Period
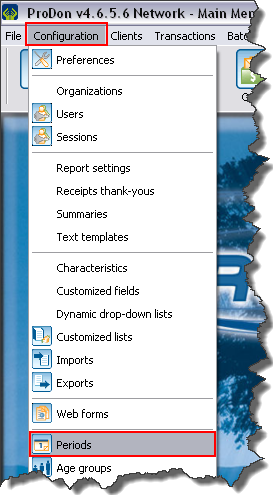
In the software main menu, first click on "Configuration", then click on "![]() Periods".
Periods".
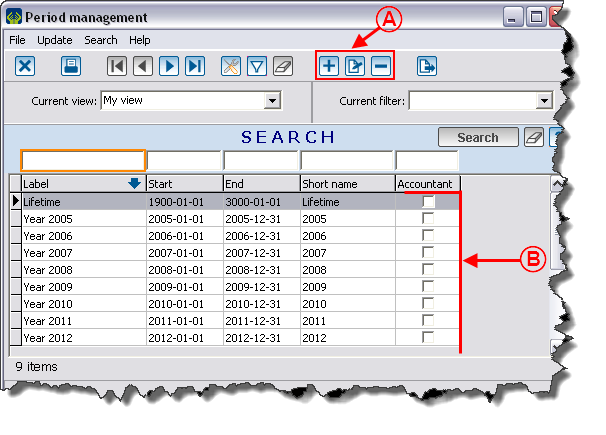
The period management window will open, it is now possible to:
 | |
|
A: Add, Edit/View or Remove periods. |
B: View the list of existing periods. |
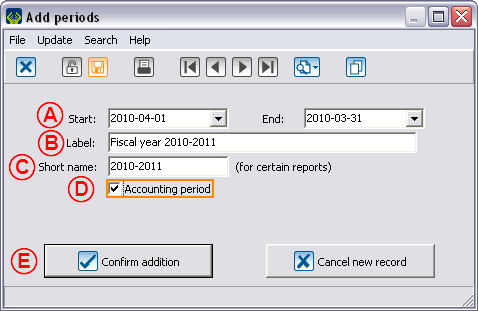
By clicking on the ![]() button, the following window will appear:
button, the following window will appear:
|
|
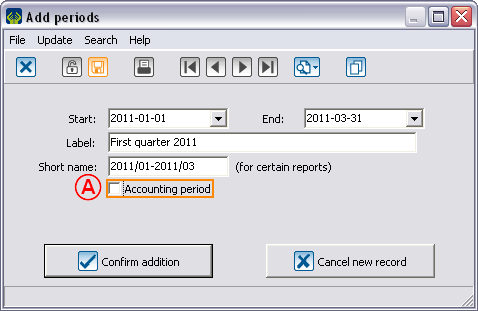
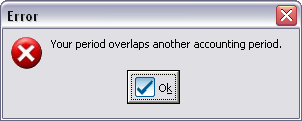
Here is the error message that appears when the dates of a new period overlap the dates of an accounting period. |
View the Summaries by Period
In a Client File
| |
|
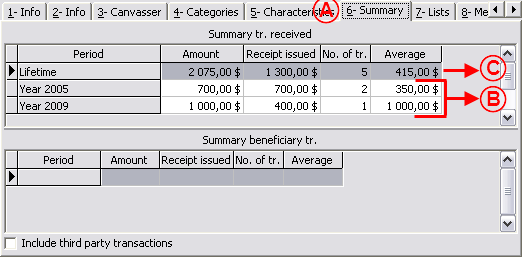
A: Go in the "Summary" tab of any client file. |
B: View the client's transactions cumulative for each period. |
|
C: Is the lifetime total of all the client's transactions. |
|
In "Analysis & History"
It is also possible to view a summary by period in "Analysis & History".
Use of a Period
In a Report
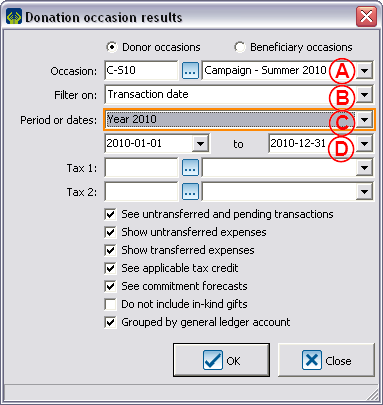
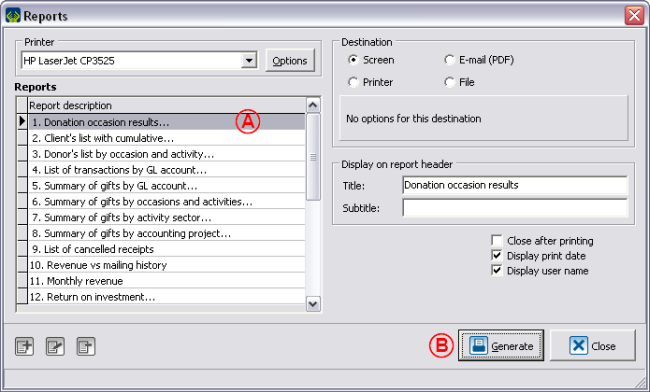
The created periods will also be available when you produce reports.
| |
|
A: Select the report to be issued (e.g. a donation occasion results). |
B: Click on "Generate". |
In a Customized List
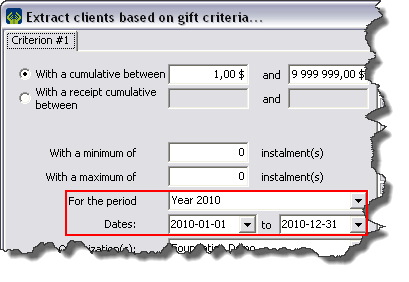
The periods can also be used in the customized client lists by donations criteria (dynamic and static lists).
Document name: ProDon:Period Management
Version : 4.6.5.6
